How to record and run tests in Recorder
Record tests
After connecting to an instrumented build, choose the Recorder tab and press the Start Recording button.
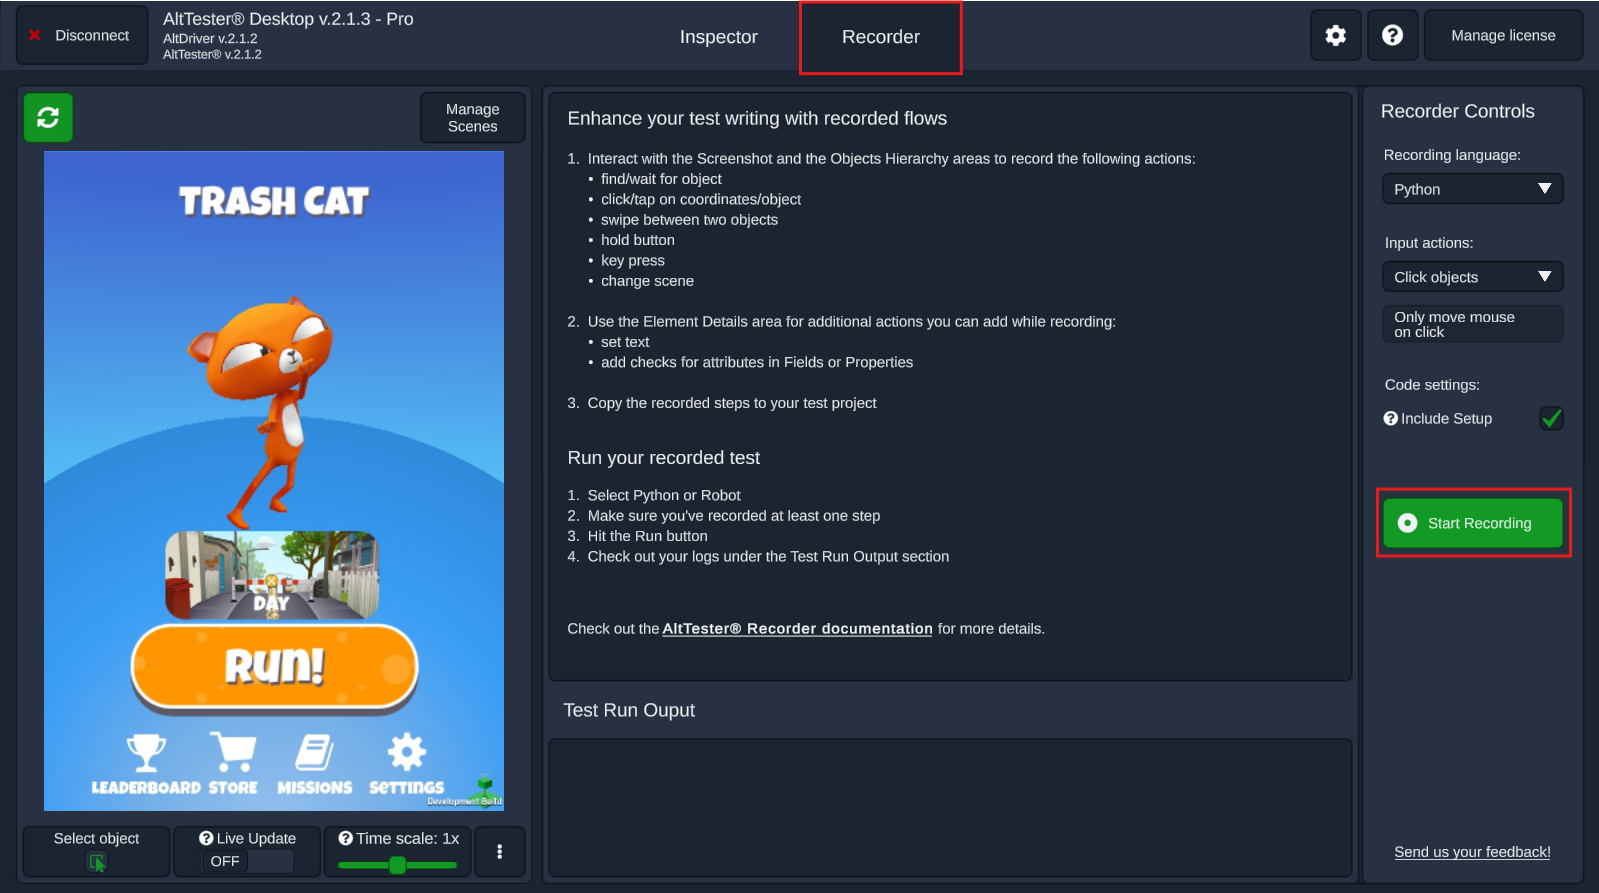
You’ll be able to record the following commands:
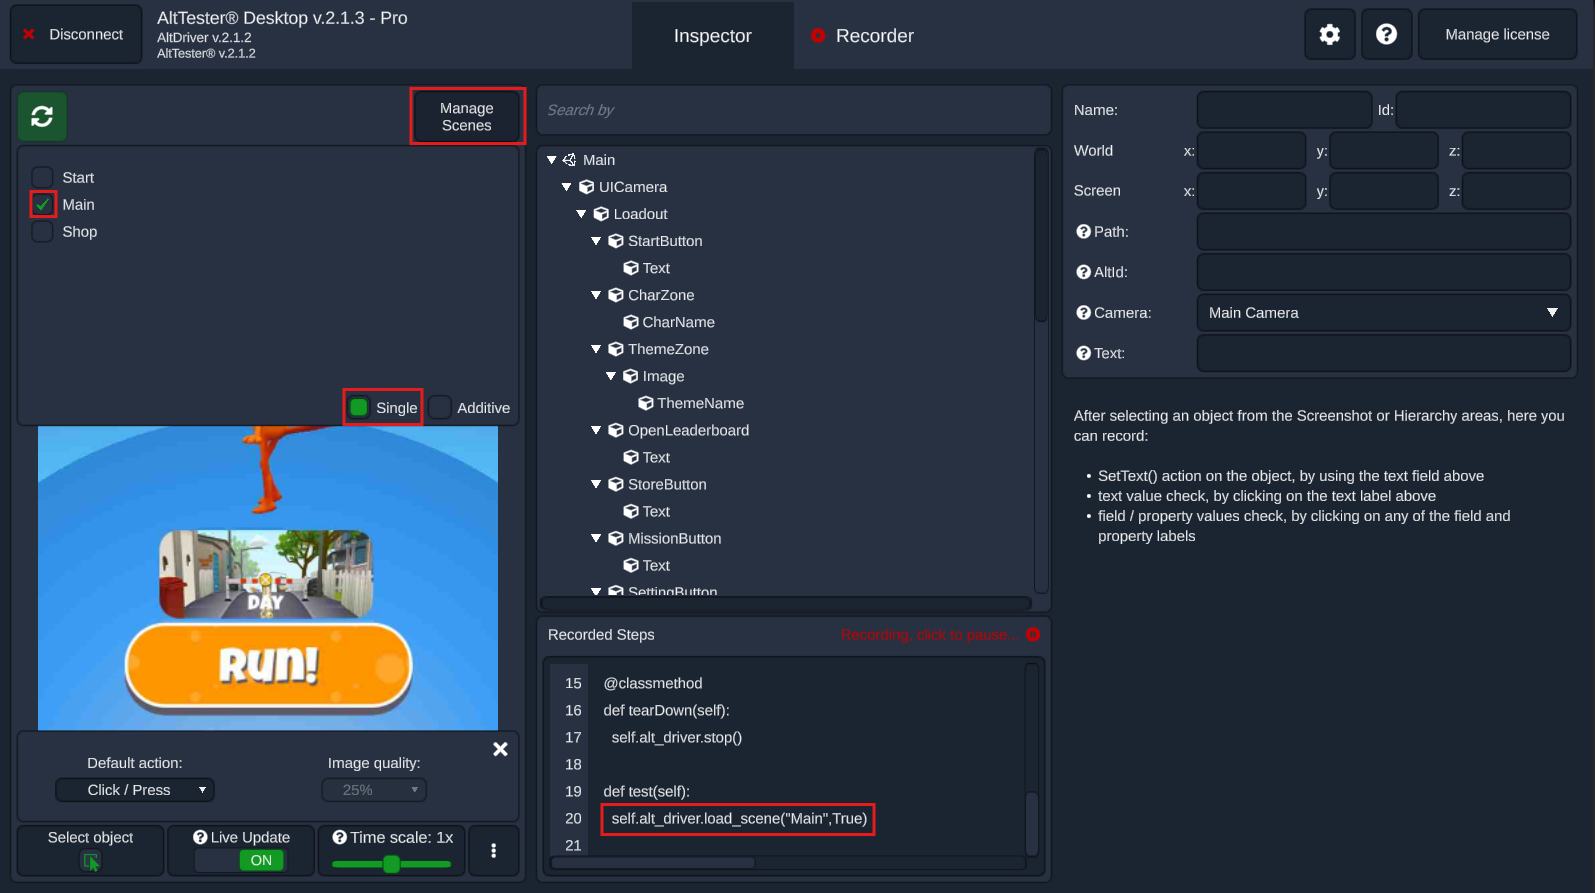
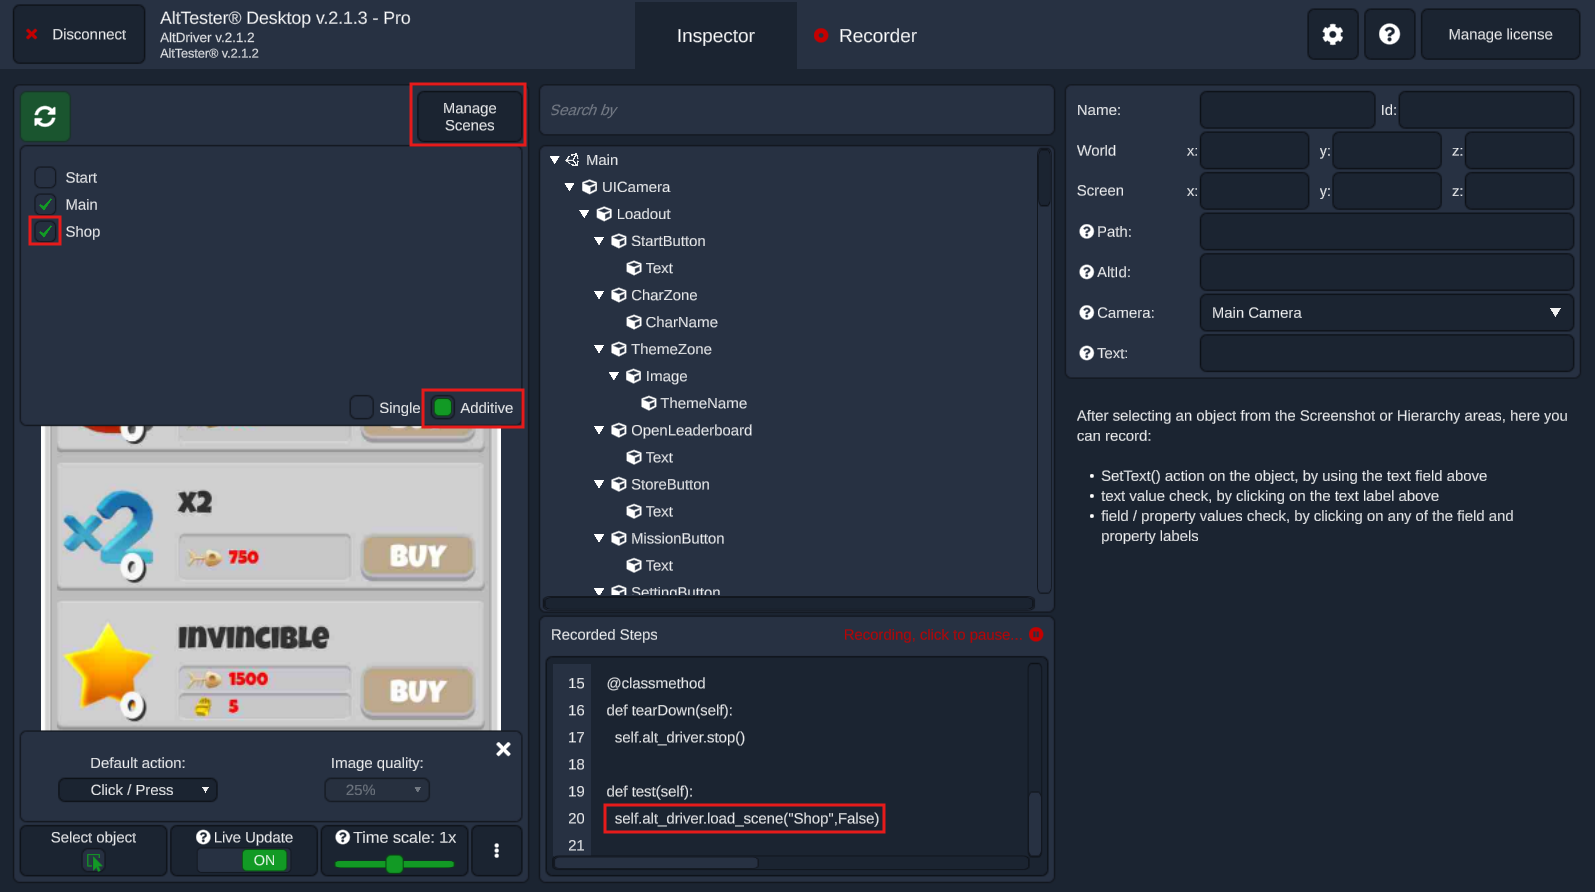
Load scene
Go to the Manage Scenes button, choose the way you want to load the scene (Single or Additive) and select the scene you want to be loaded in the test.
Load a scene with Single selected:
Load a scene with Additive selected:
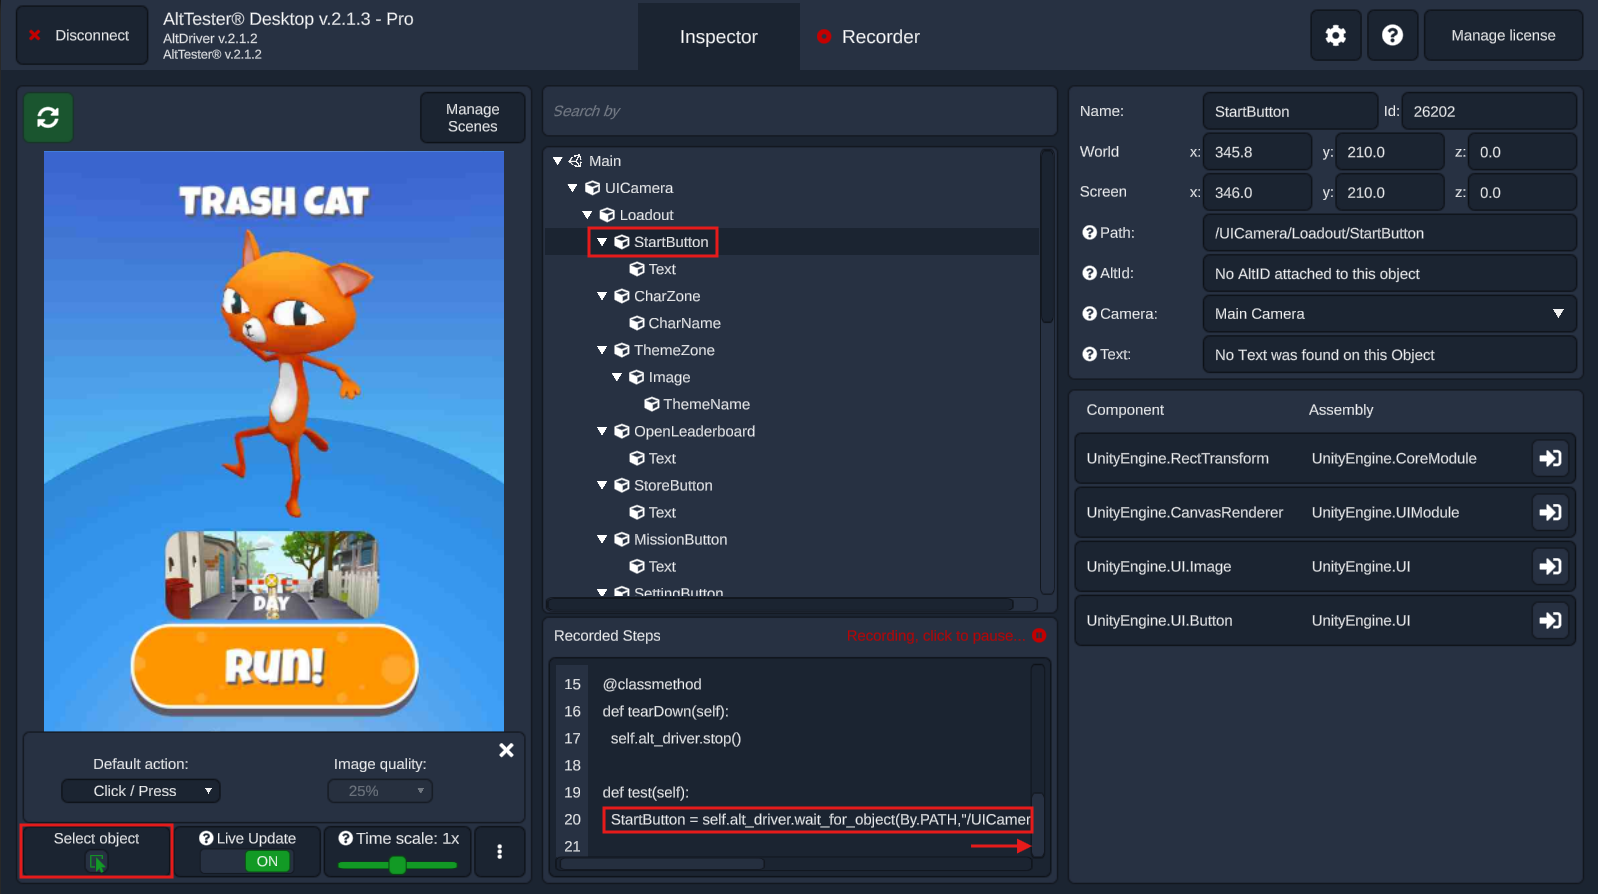
Wait for object
With Select object active, click on any element from the Screenshot area or from the Objects Hierarchy area to record a step that waits for the selected object to be present.
Click on object
With Select object inactive and Default action set to Click/Press, choose Click objects from Recorder controls > Input actions then, by clicking on an object in the Screenshot area, it will record the click command on that object.

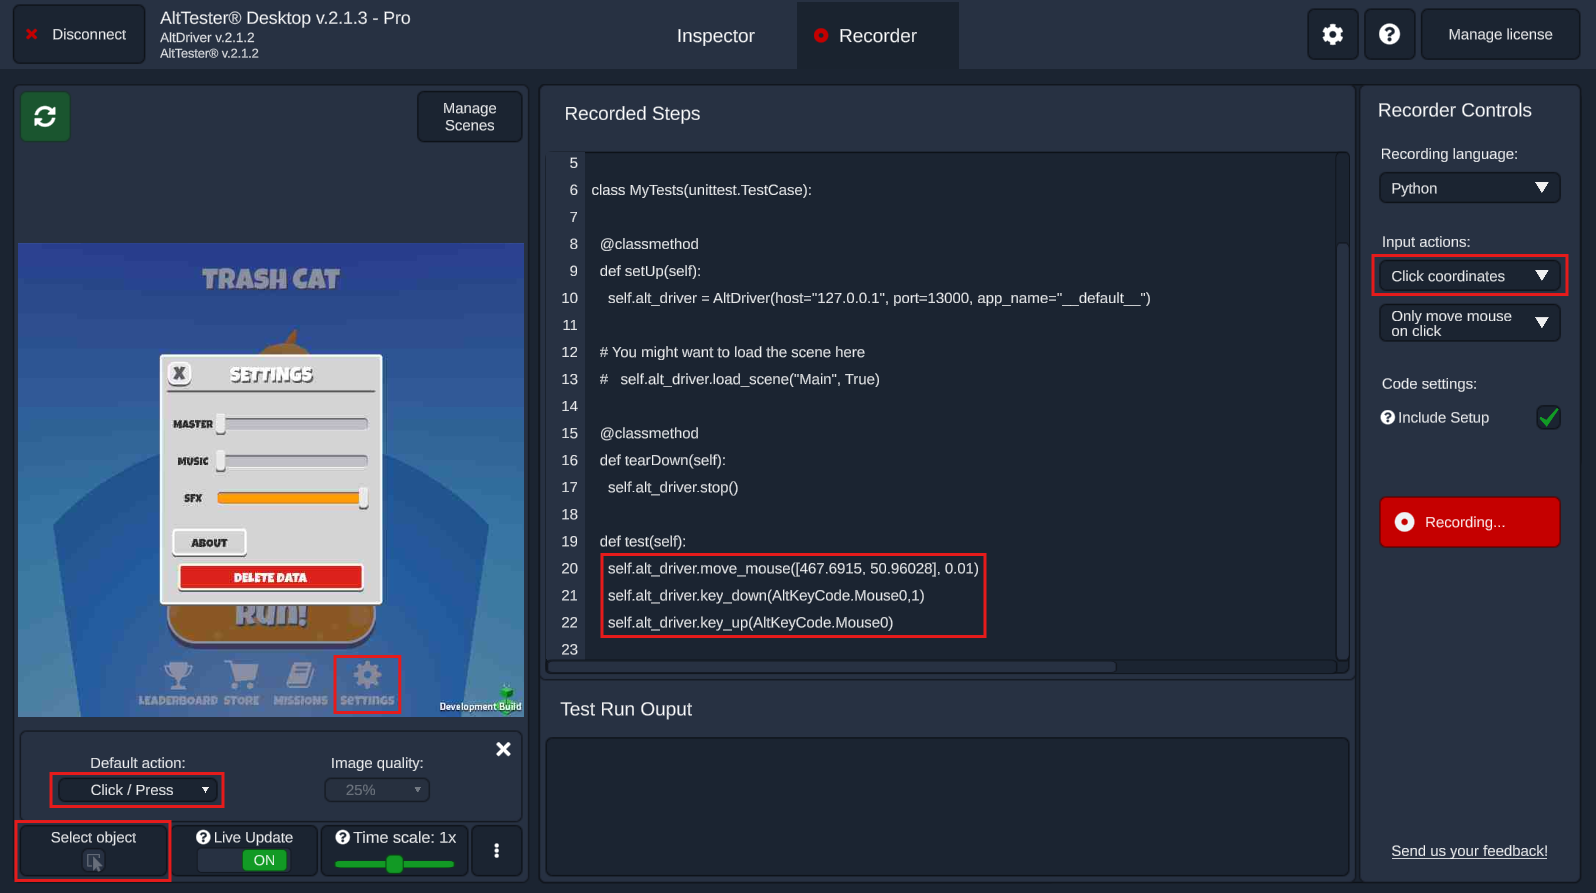
Click on coordinates
With Select object inactive, choose Click coordinates from Recorder controls > Input actions then, by clicking on an object in the Screenshot area, it will record the click command on the screen position where the click was made.
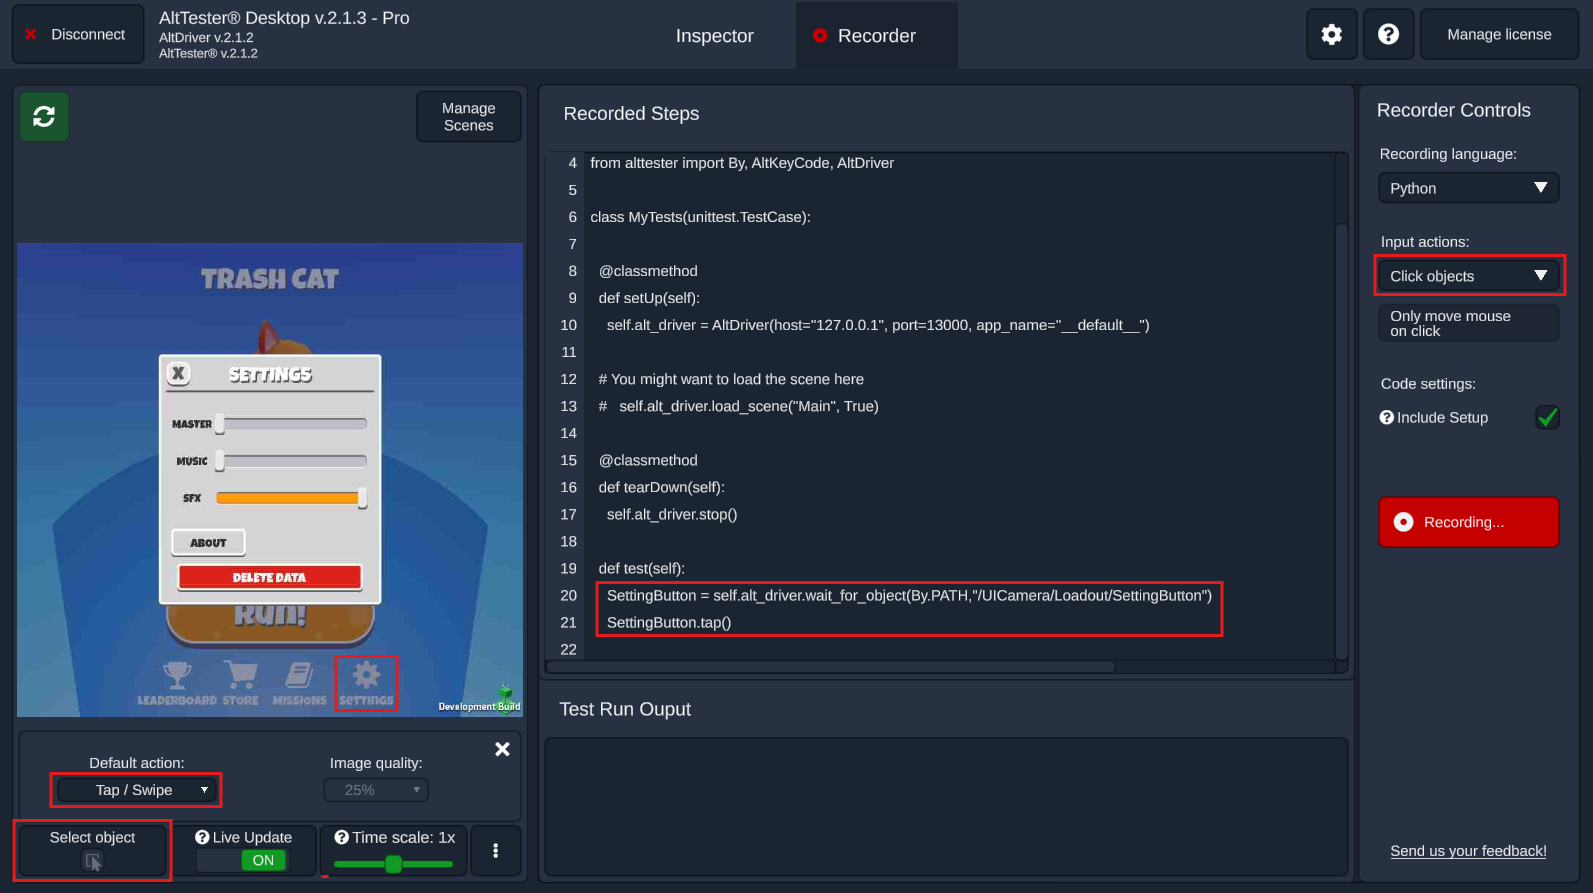
Tap on object
Now change the Default action to Tap/Swipe, keep Select object inactive. Choose Click objects from Recorder controls > Input actions and tap on an object in the Screenshot area. This will record a tap command on the selected object.
Tap on coordinates
Keep the Default action set to Tap/Swipe and Select object inactive. Choose Click coordinates from Recorder controls > Input actions and tap on an object in the Screenshot area. This will record a BeginTouch and an EndTouch command on the screen position where the tap was made.

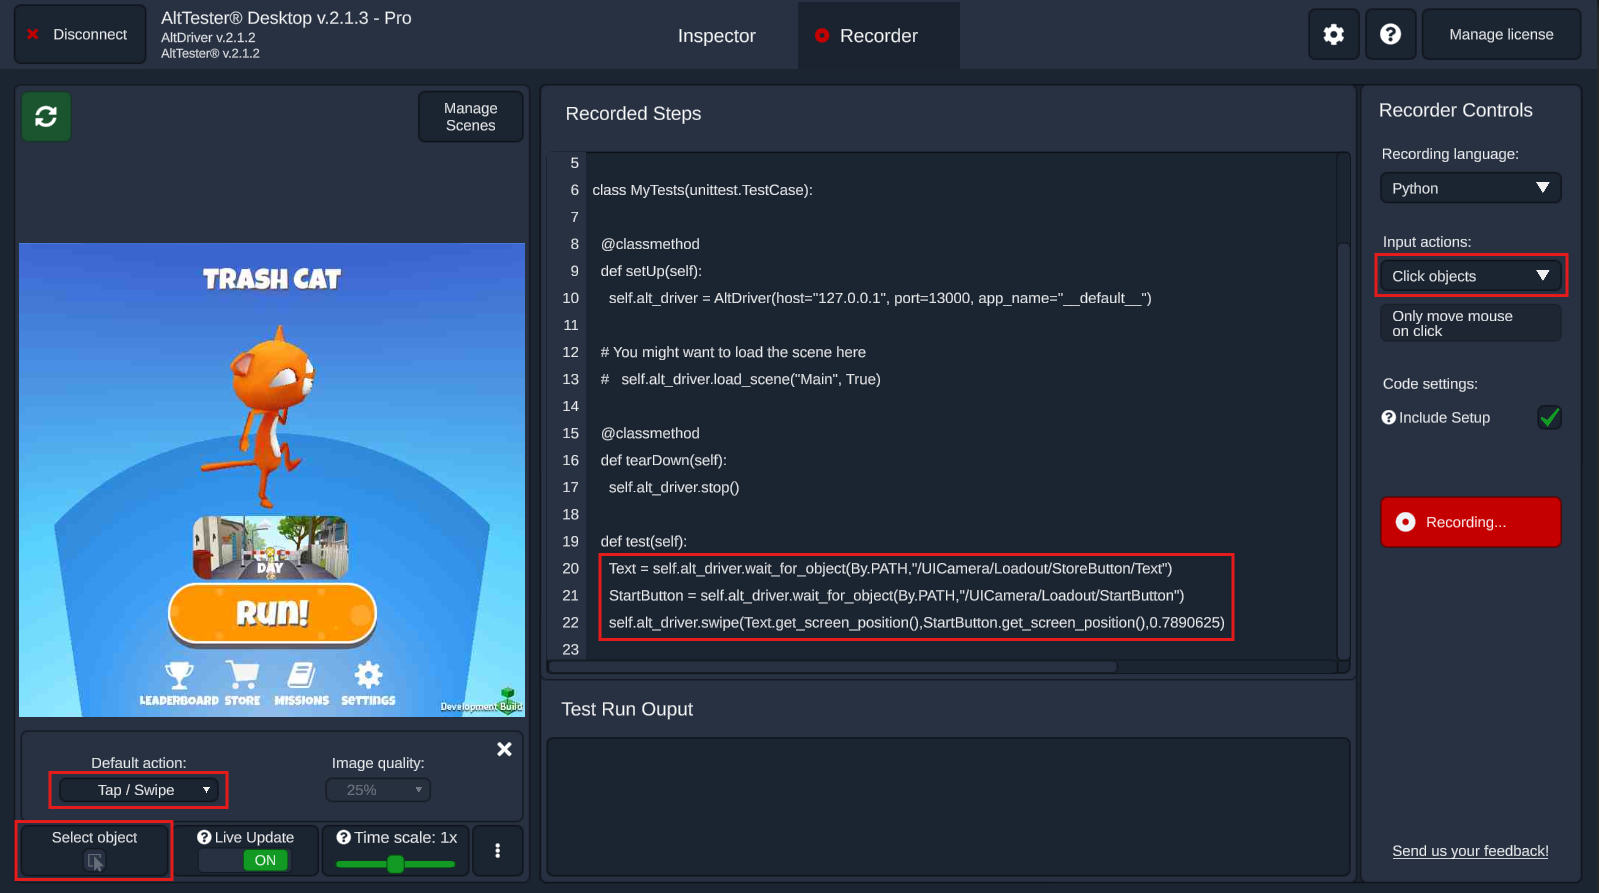
Swipe
Keep the Default action set to Tap/Swipe and Select object inactive. Choose Click objects from Recorder controls > Input actions and swipe from one object to another one. In the example below the swipe was recorded from the StoreButton to the StartButton.
Hold button
In this case the Default action can be any of the two options and Select object should be inactive. Choose Click objects from Recorder controls > Input actions and hold a button for a longer period of time (a couple seconds). In the example below a longer left click was performed on the Settings button.
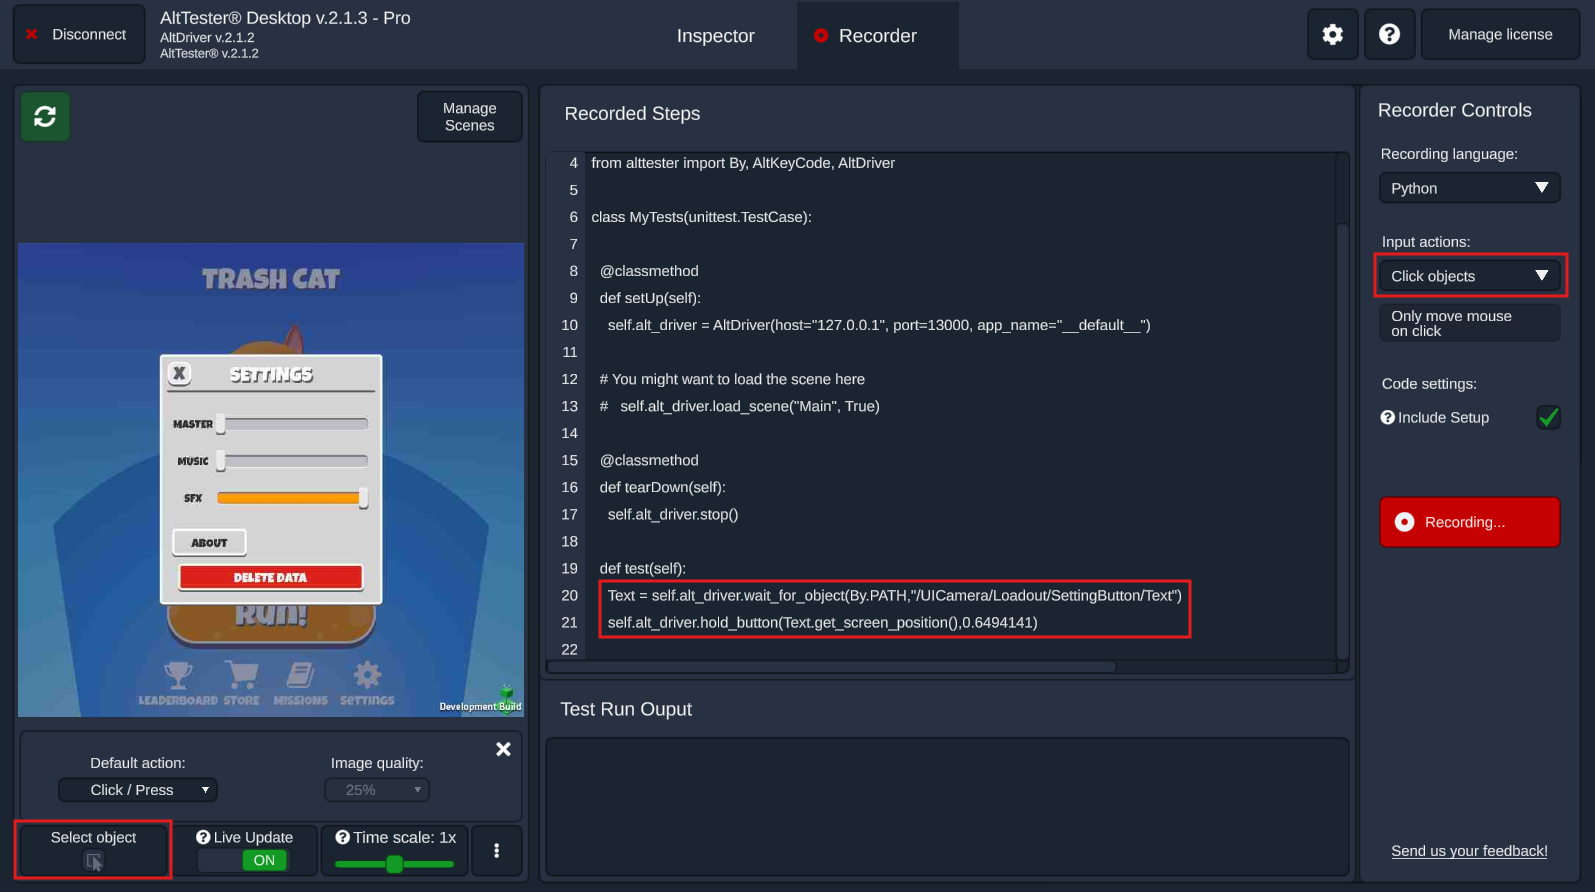
If the click action takes at most 0.2 seconds, then a Click action is recorded; otherwise if the click takes longer then a HoldButton is recorded with a parameter indicating the length of the action.
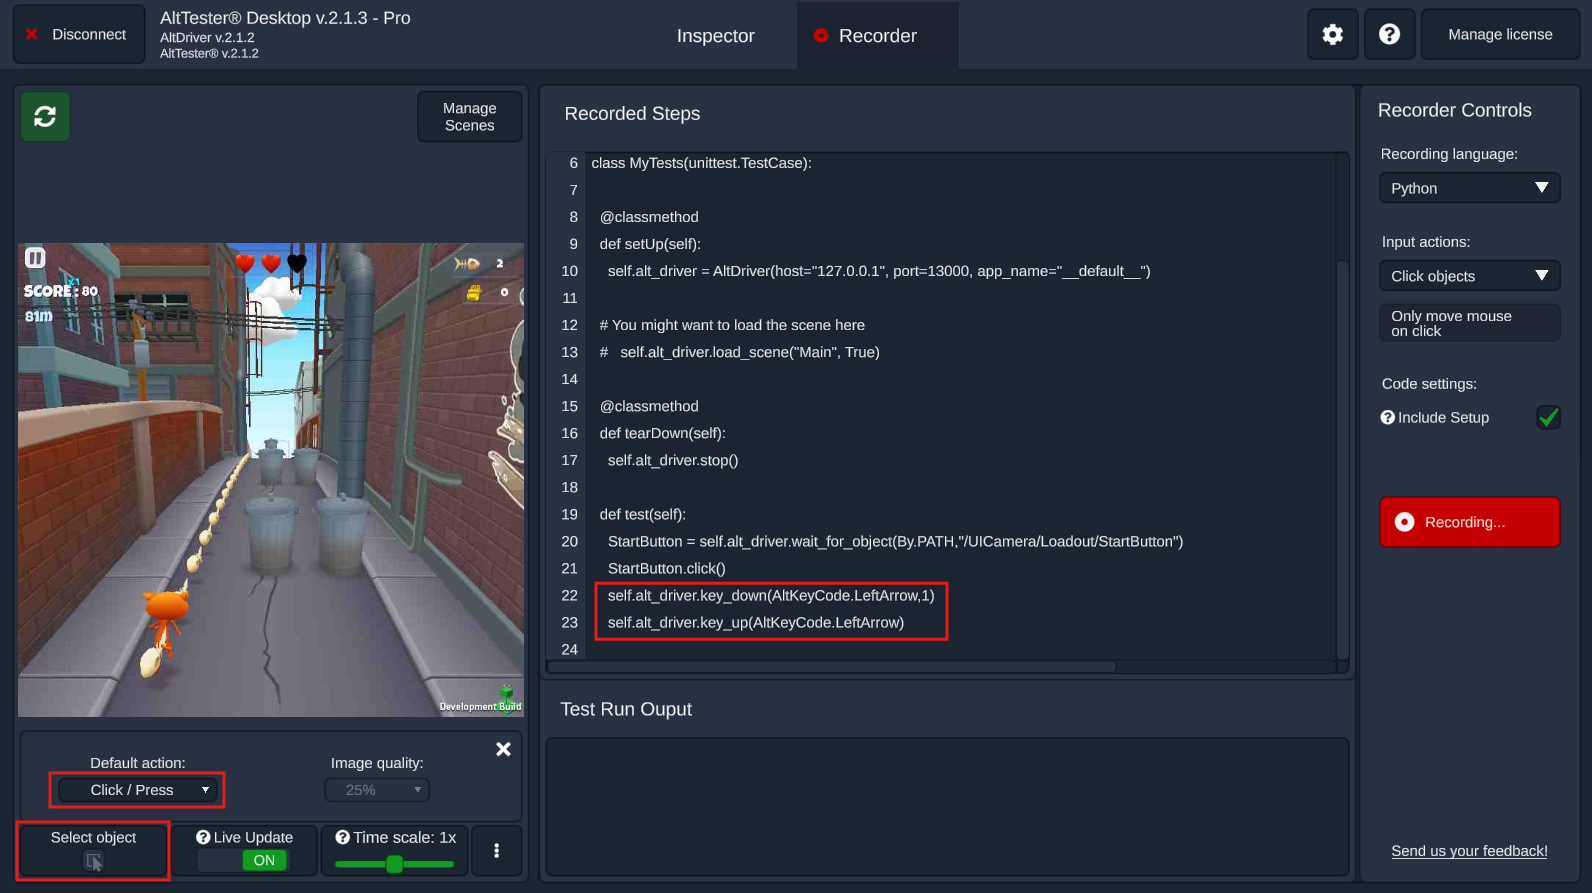
Press key
Keeping Select object inactive and Default action set to Click/Press, press any key that controls your game. In the example below the left arrow was pressed to avoid an obstacle on the road.
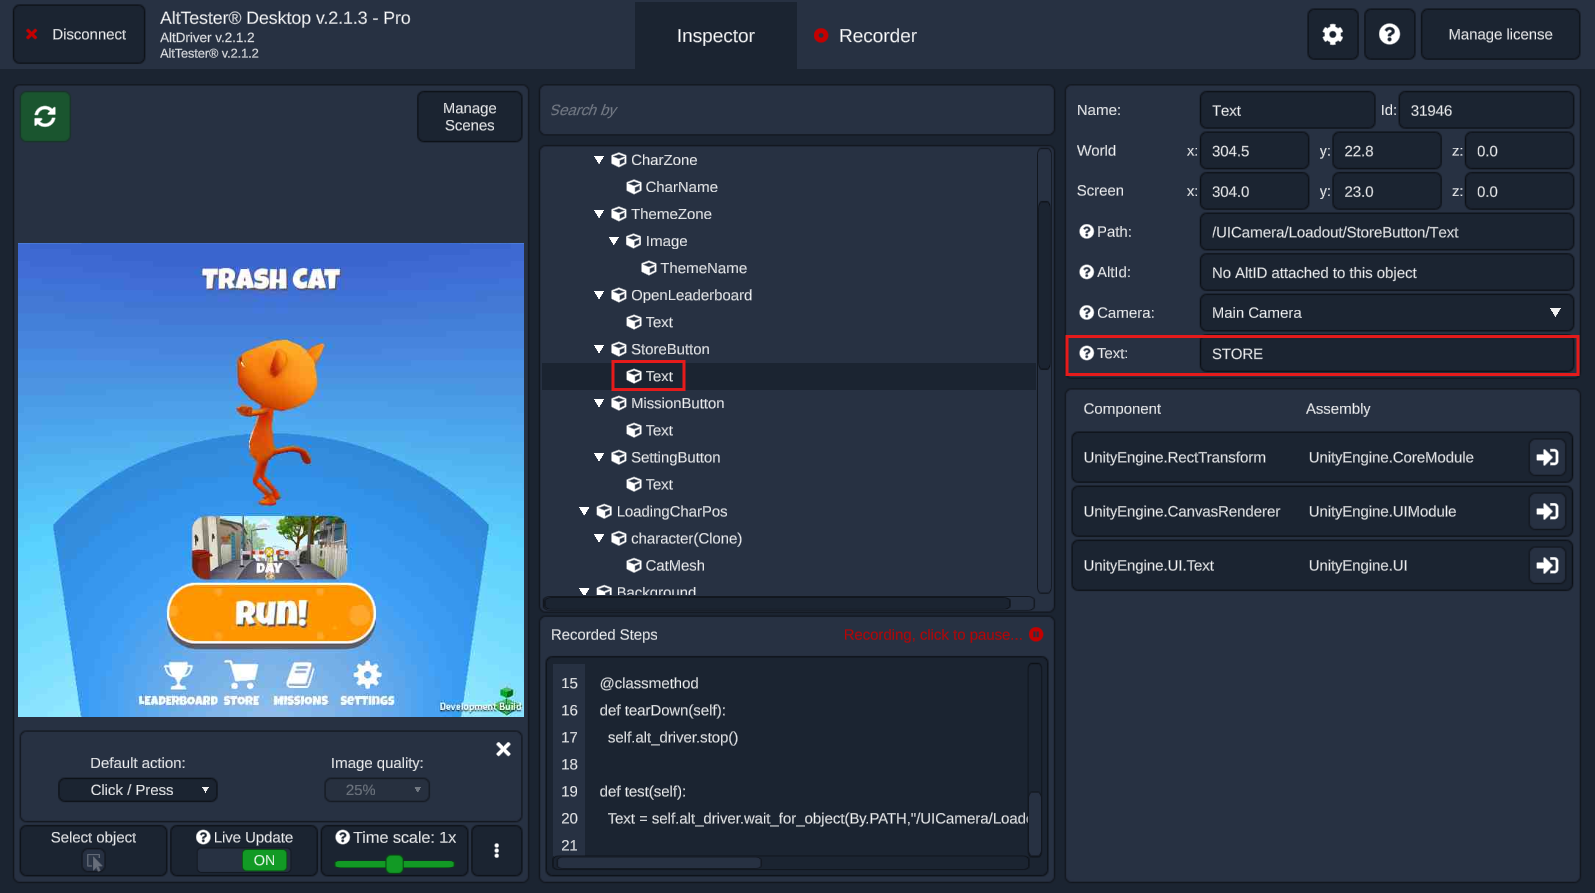
Set text
For objects that have a text component, like a label, button, input field etc., you can select the Text input field in the Element Details area and change the content during recording. After hitting enter, a new step will be generated in the test that sets the text from the object to the one that was given.
Before changing the text:
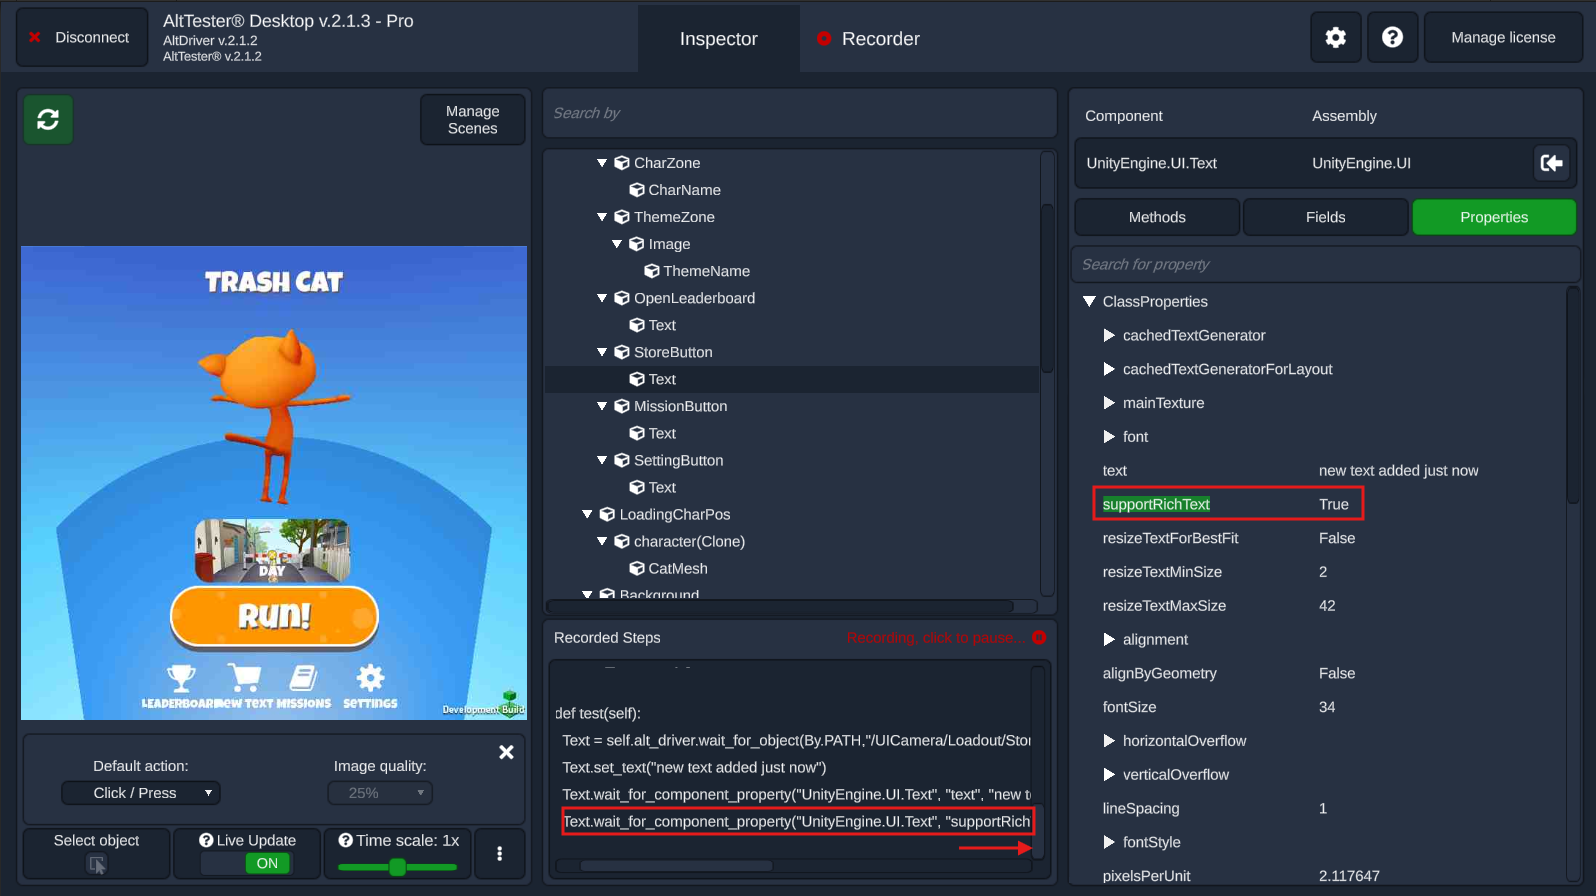
After changing the text:

Add assertion
For objects that have a text component, you can click on the Text label in the Element Details area and it will record a WaitForComponentProperty command on the input field’s current content. This is equivalent to an assertion with the only difference that it has a timeout and will wait 20 seconds, by default, for the appropriate variable to have the specified value.

You can also navigate to the Fields and Properties columns and click on a primitive field/property label. This will also generate a WaitForComponentProperty command in the recorded steps.
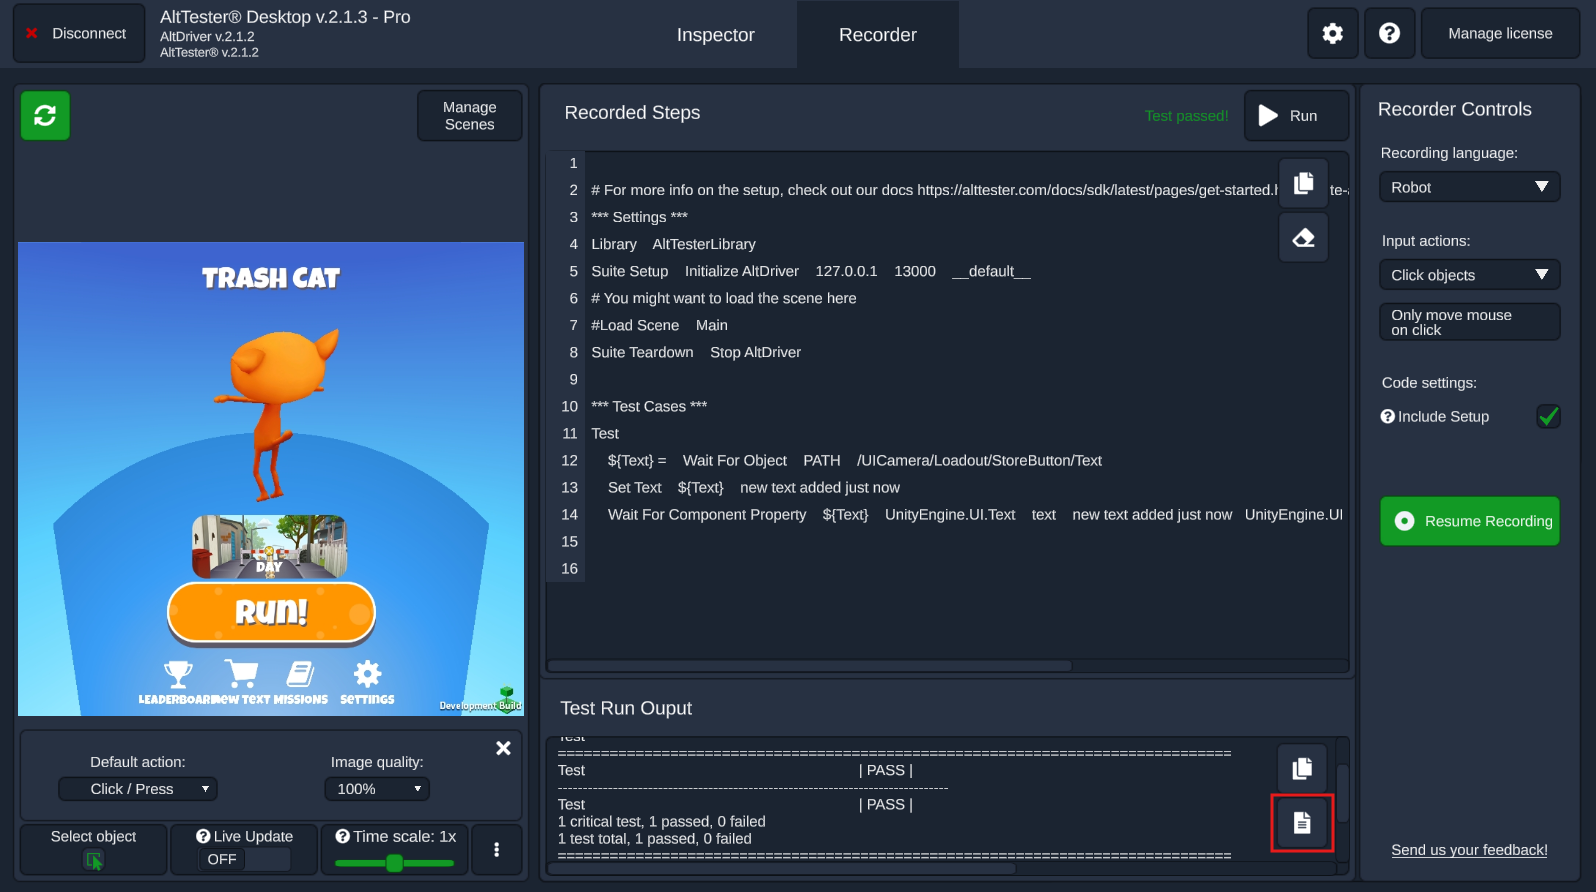
Run tests
Note
At the moment, test running is available only for Python and Robot Framework.
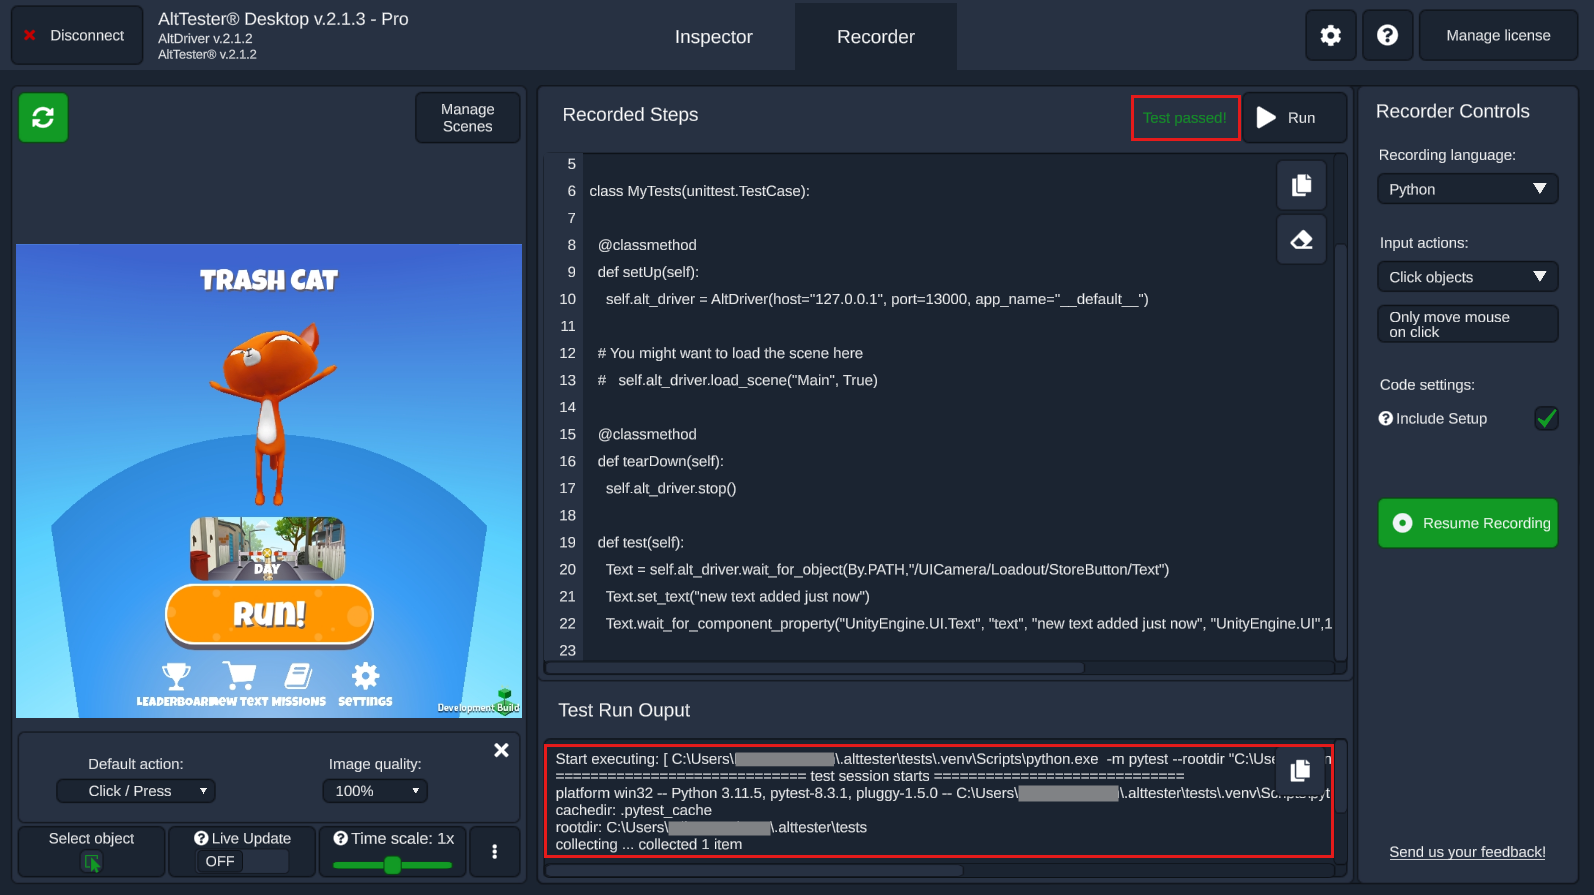
In the Recorder tab, after stopping recording a test, use the Run button available at the top right of the Recorded Steps section.
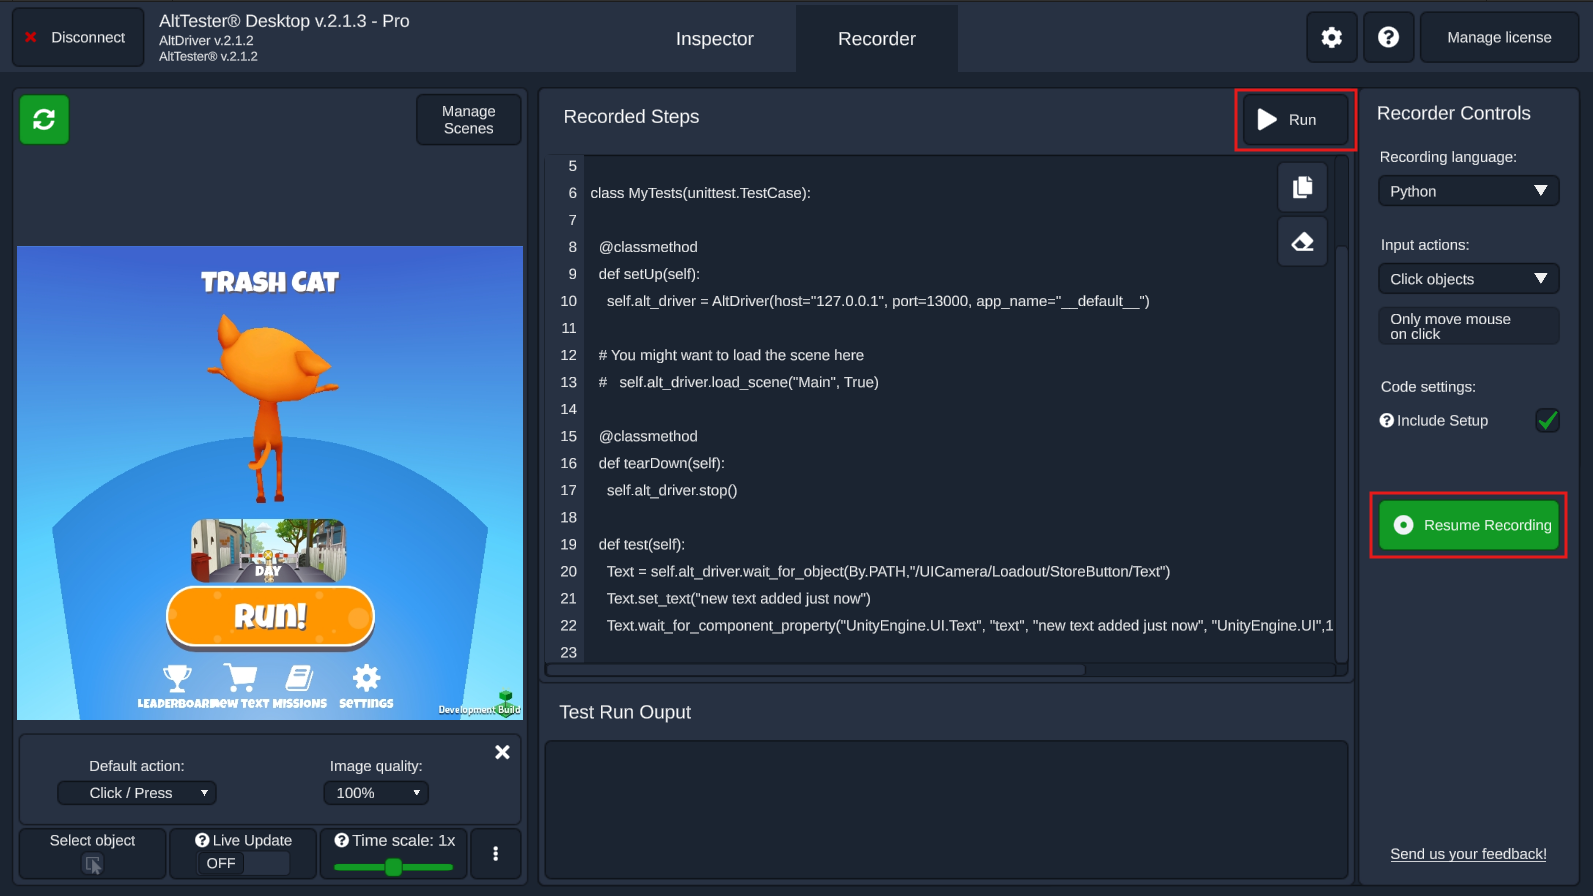
After the test run is done, on the Recorded Steps section the passed/ failed test result will be displayed on the left of the Run button. In the Test Run Output section the test output will appear.
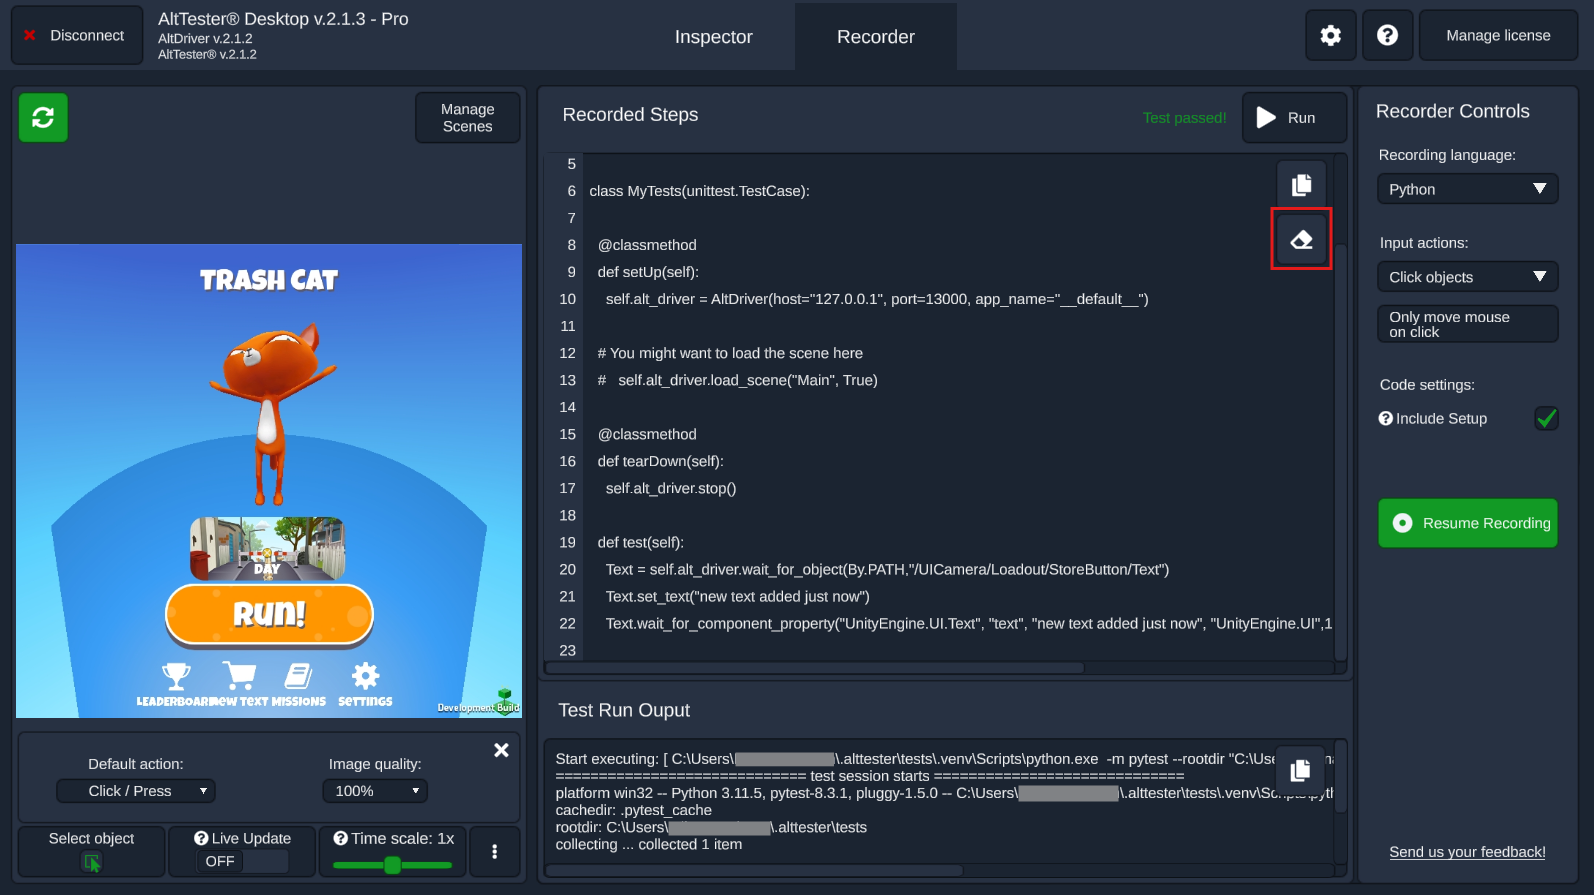
To start over with a new test, in the Recorded Steps section just use the button with the eraser icon to delete the steps and the test output and then, proceed with a new recording and test run.
Each test run will have timestamped folder artefacts containing the test script and the output log saved in the history folder having the path provided in the Settings page in Path for recorded tests scripts and logs.
For Robot Framework you can also open in browser the html test report generated by clicking on the file icon from the Test Run Output section.