UI Components
Screenshot
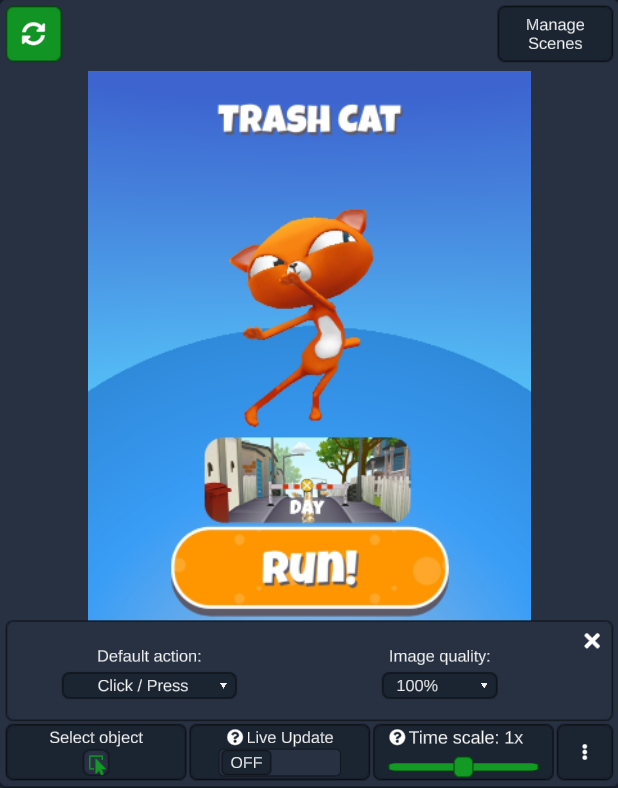
A screenshot of your game is displayed and updated to reflect the current state of the game. You can interact with it using mouse, keyboard, touchscreen and joystick operations
Live Update: Enables/disables automatic game updates. When this is on, refreshing the screenshot is done automatically. When a recording is started theLive Updateis turned ON automatically and when the recording is stopped it is tuned OFF.Image Quality: in order to enhance performance, quality can be changed. IfLive Updateis off, you can choose between 25%, 50%, 75% and 100%; otherwise, ifLive Updateis on, only the 25% option is available to save resources.Time Scale: controls the speed of the game. If it is set to 0 then the game stops.Refresh: updates the Screenshot area, to reflect the current state of the game. It can be used only when live update = OFF, as with live update ON the Screenshot is auto-updated.Default Action: different actions, when selected, affect how the interaction with the screenshot works:Swipe/Tap:Interacts with the screenshot simulating touchscreen actions.
Click/Press: Interacts with the screenshot using the mouse and keyboard.
Select Object: Selects and highlights an element from the Screenshot area to inspect its properties. When live update is ON, objects can be selected only from the Objects Hierarchy area. The highlight color can be changed from Settings page.Manage Scenes: in case of games with multiple scenes, it makes it possible to switch and inspect objects from different scenes.You can choose to load/unload scenes in single/additive manner.
Objects Hierarchy
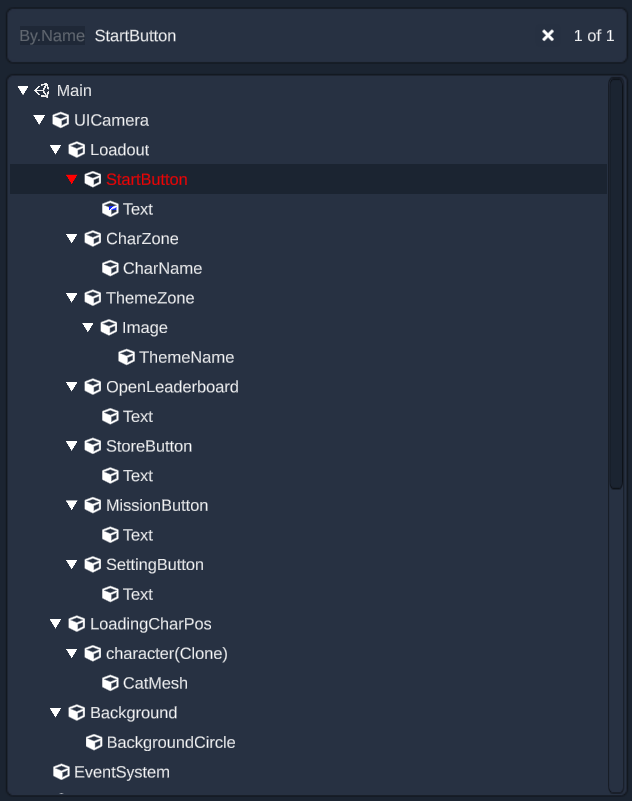
All Objects from the selected scene of the game are displayed in a hierarchical manner.
Search: you can search for a specific element By.Name, By.Text, By.Id, By.Tag, By.Layer, By.Component, By.Path.Element Breakdown Section: contains all the elements from the currently selected scene. Elements are wrapped in one element having the name of the scene.Expand All: expands and displays all the nested objects from the Objects Hierarchy area.Collapse All: collapses the child objects from the Objects Hierarchy area.Expand all children: expands all elements that are children of the right-clicked element.Collapse all children: collapses all elements that are children of the right-clicked element.
Element Details
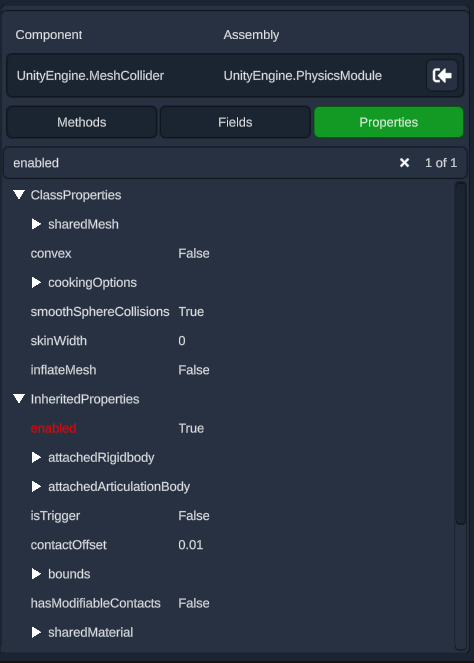
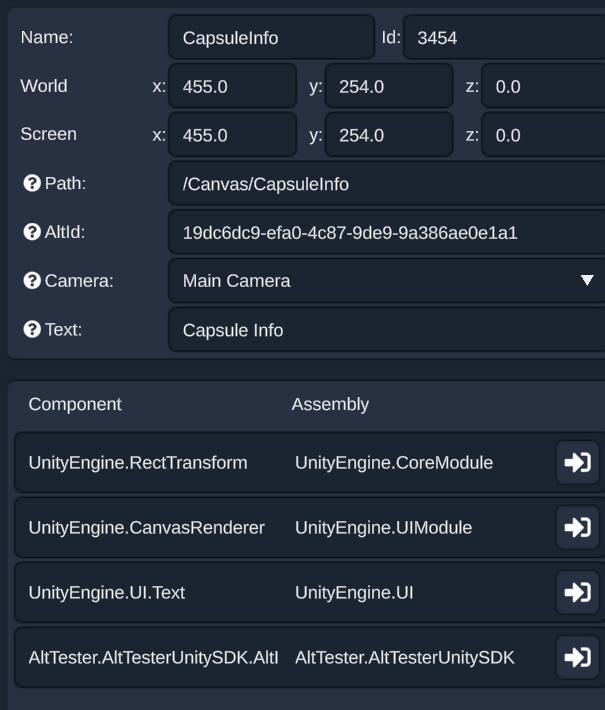
Details about a selected element like name, id, coordinates, components and many more are displayed here.
Contains the following information:
NameIdWorld CoordinatesScreen CoordinatesPathTextdisplays the assigned text, which can be changed by entering a different text and pressing Enter (This action can also be used in recordings).AltId, a unique Id generated by AltTester® Unity SDK for elements that are already in the scene, before building the appComponentandAssemblyof the selected element
Cameracan be changed by clicking on Main Camera dropdown if having multiple cameras in the Scene.Opening a Component will display the following:
Methods- list all methods that are in the componentFields- list all fields that are in the componentProperties- list all properties that are in the componentEach list also has a search bar that makes finding methods, fields and properties easier.
Header
This is how it looks like for a Community plan (only AltTester® Server allowed connection) on the Connection Setup page:

And in case of a PRO plan in the inspect mode after connecting to the instrumented app/ game:


Disconnect: disconnects AltTester® Desktop from your instrumented app.Versions: you can find the versions ofAltTester® Desktop,AltDriverandAltTester®here.Inspector: allows you to inspect the elements of your app.Recorder: opens the recorder window allowing you to record tests in multiple languages and run the recorded tests in Python and Robot Framework.Settings: opens the settings page.
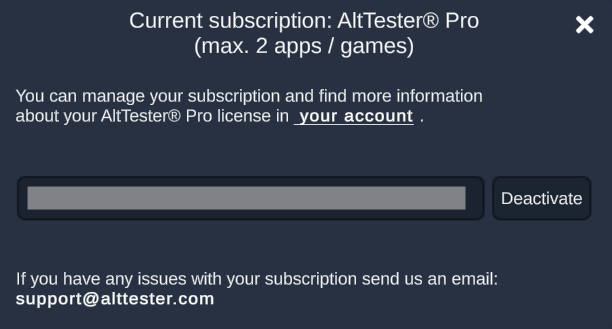
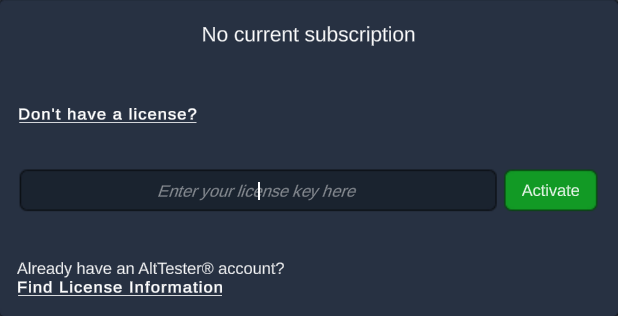
Support: opens the panel with links to logs, feedback, Discord, documentation, terms and conditions, getting started guide and our email for support.Manage license: you can find information related to your current subscription and have access to information related to your account. You can also activate/deactivate any type of license here.
Recorder
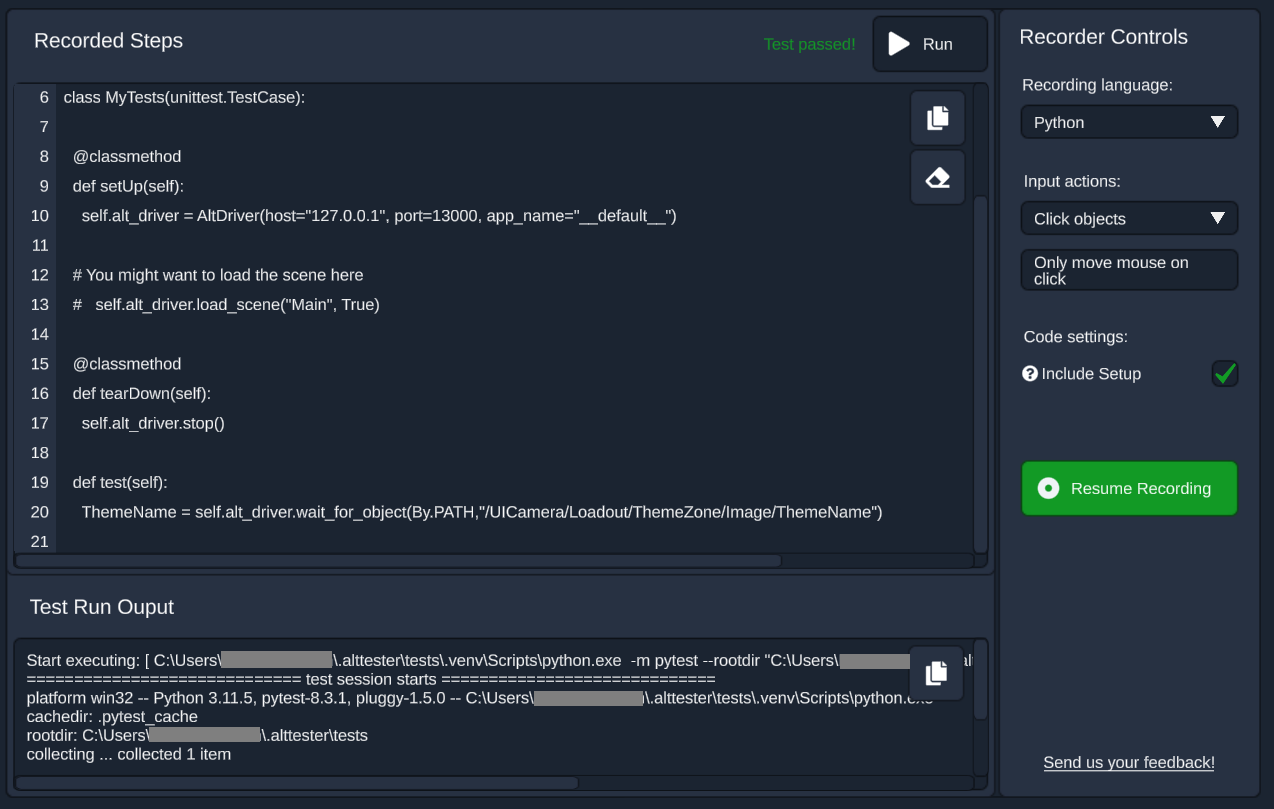
By pressing the Recorder button from the header of the AltTester® Desktop a new section will open up having the following areas with components:
Recorder Controls
Start recording: will record your interaction with theScreenshot/Objects Hierarchyarea and will generate assertions based on what field you choose in theElement DetailsareaRecording language: you can choose the language to generate the tests in (C#, Python, Java and Robot Framework are available)Input actions:Click objects/Click coordinates:if
Click objectsis selected -will record a
Tap()command on the object (when tap < 0.2 s) when the default action is set toTap / Swipewill record a
Click()command on the object (when click < 0.2 s) when the default action is set toClick / Presswill record a
HoldButton()command (when tap/click >= 0.2 s)will record a
Swipe()command from object to object when the mouse was moved while holding the tap/click
if
Click coordinatesis selected -will record the
MoveMouse(),KeyDown()andKeyUp()commands in the test, moving the mouse to certain screen coordinates. These methods will be recorded when the default action is set toClick / Presswill record the
BeginTouch(),MoveTouch()andEndTouch()commands in the test, moving the mouse to certain screen coordinates. These methods will be recorded when the default action is set toTap / Swipe
Only move mouse on click/Move mouse while recording:if
Only move mouse on clickis selected - the change in the mouse position will be recorded only when a click is performedif
Move mouse while recordingis selected - the change in the mouse position will be recorded even if there is no click performed
Code settings:Include Setup:if unchecked - only the current test will be displayed
if checked - the current test will be displayed together with the setup and the imports. In your test file you need the setup methods (
OneTimeSetup()andOneTimeTearDown()) only once and the generated tests can be added to the end of the file
Recorded Steps
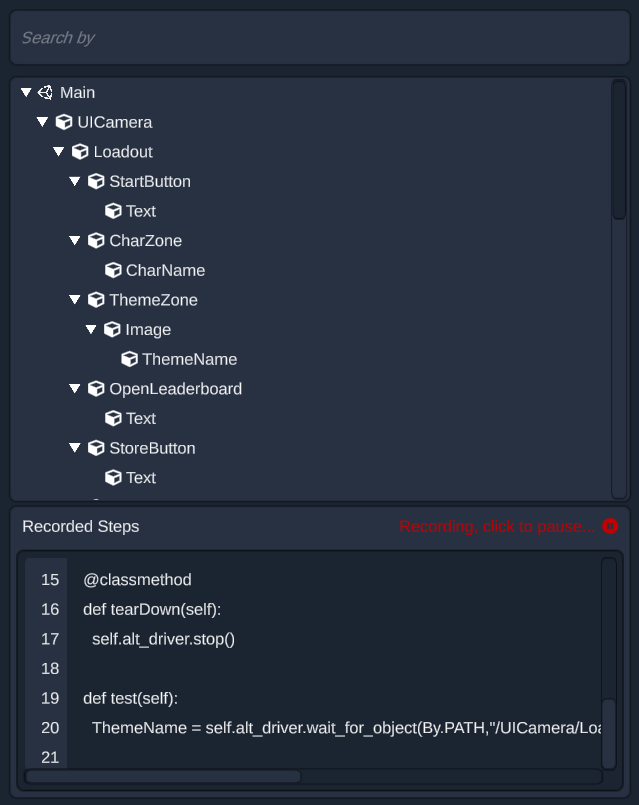
under this tab are displayed the recorded steps and they will be also displayed during a recording on a small area under the
Objects Hierarchyfrom theInspectortab (see the image on the right)Run:runs the recorded steps in Python or Robot Framework
if you don’t have Python installed or you have a version less than or equal to 3.8.0, Python 3.12.4 will be installed at
C:\Users\USERNAME\.alttester\python\on Windows and at/Users/USERNAME/.alttester/tests/.venvon MacOS
Copy button: will copy all the recorded steps to the clipboardErase button: will erase the steps recorded and the output for the run test
Test Run Output
under this tab are displayed the logs after running a test
Copy button: will copy the output to the clipboardTest report button: for Robot Framework will open the generatedreport.htmlin the default browser
Settings
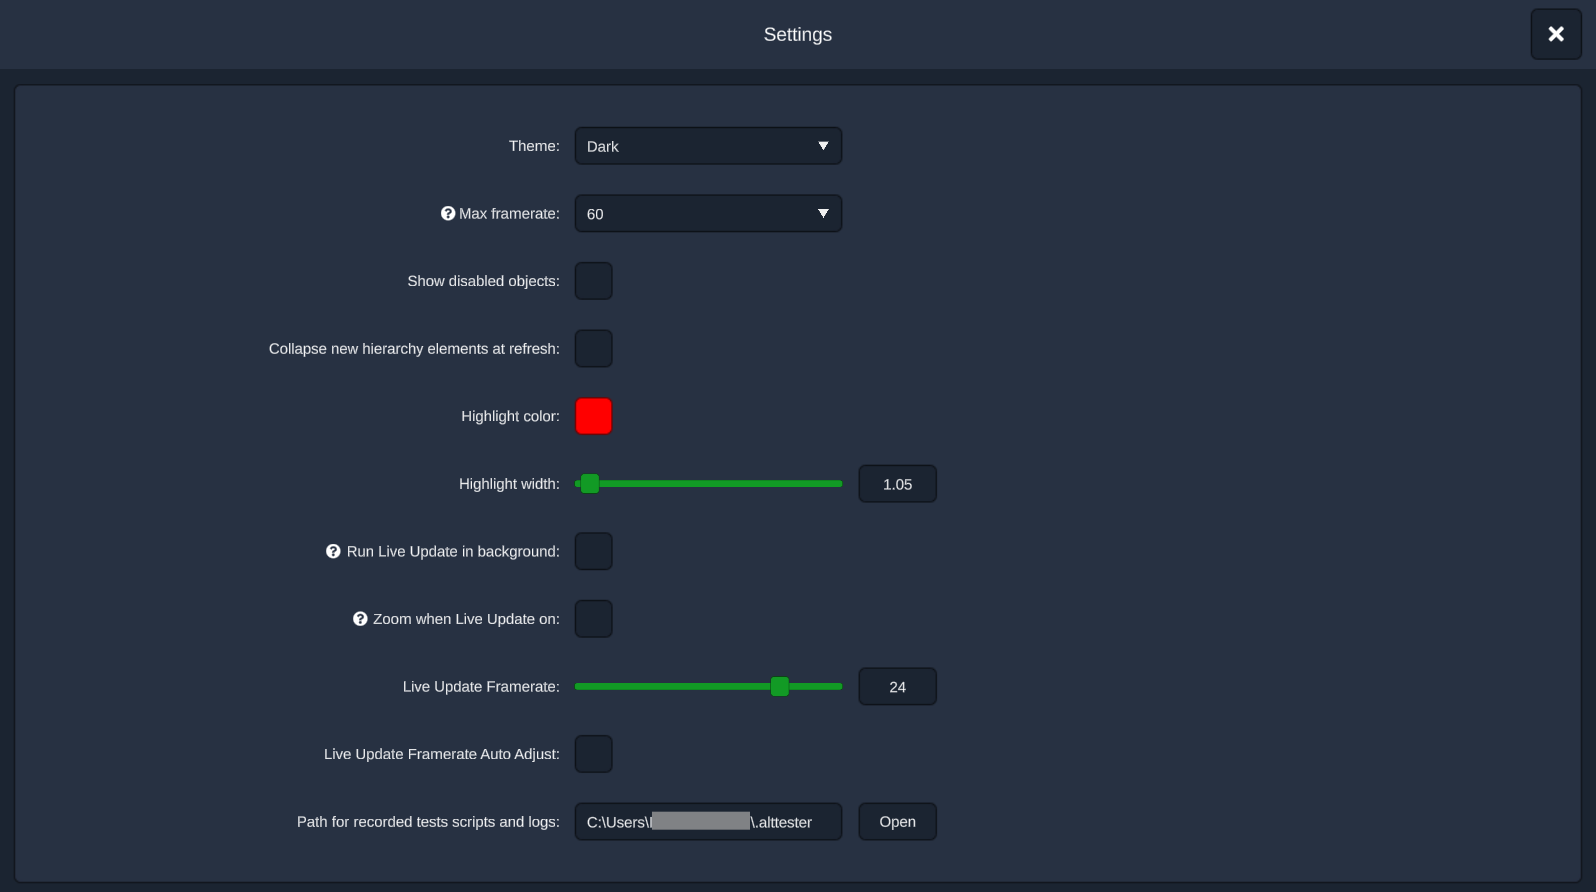
Theme: Change between Dark and Light themes.Max framerate: The number of commands made per second. This should be set depending on the processing power. The higher the framerate is set, the faster the commands are executed.Show disabled objectsRun Live Update in background:Disabled: Live update works only when AltTester® Desktop is in focus.
Enabled: Live update works also when AltTester® Desktop is in the background. It allows you to interact with the game and see the actions reflected in AltTester® Desktop.
Collapse new hierarchy elements at refreshHighlight Color: Sets the color used to highlight a selected element. Both elements in the Element Details and Screenshot areas will use this color. To close the color picker you need to click on the colored box next to the “Highlight Color” label.Highlight widthZoom when Live Update on: When enabled, zooming in and out on the screenshot area also works when Live Update is on. On a Mac, use the scroll up and down gesture on your touchpad to zoom in and out.Live Update Framerate: The number of screenshots per second sent from the game when live update is on. This should be set depending on the processing power. The higher the live update framerate is set, the faster the game will update in the Screenshot area.Live Update Framerate Auto Adjust: In case the machine does not support as many frames per second as the value set with Live Update Framerate, then the number of frames will auto adjust to a lower one.Path for AltTester® Related Files: The path used to save the tests, logs and downloaded files. It can be changed by pressingOpenand copying the desired path to this input field.Configure AltTester® AI Extension: Press theOpen Configuration Setupbutton to open a pop-up window containing information on configuring the AI Extension.AltTester® Server Certificate: Allows configuring a TLS certificate for running the built-in AltTester® Server in secure mode.Certificate Path: Path to a valid.pfxcertificate file containing the certificate and its private key.Certificate Password: Password used to decrypt the certificate, if required.
When a valid certificate is provided, the server automatically starts in secure mode (WSS). Clearing both fields switches the server back to non-secure mode (WS).