Running tests from the Recorder is a new feature that was introduced in AltTester® Desktop in version 2.1.2. It allows users to replay the test previously recorded directly from the app. In this tutorial, we will walk you through the process of recording and then running a test directly in AltTester® Desktop, which will help you streamline the testing work on your game development project.
Let’s explore the necessary steps for running your test. You can use the video tutorial below to walk you through the process or check our step-by-step guide in the article.
Prerequisites
- Have an instrumented build of the app you want to run your tests on
- Make sure that you have a pro or enterprise license
- Connect the AltTester® Desktop to the instrumented build
Check the video tutorial below:
Step-by-step guide for running your test in AltTester® Desktop
First, you have to record a test in AltTester® Desktop. To do this, choose the Recorder tab and hit Start Recording.
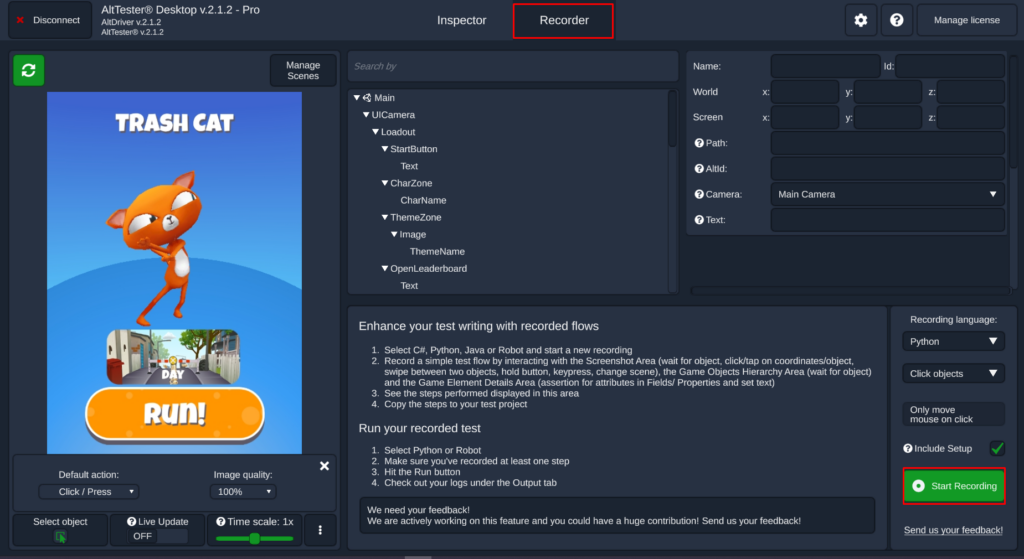
Any action performed on the screenshot area, the hierarchy area or the element details area will generate an entry in your test. The screenshot area can be used for recording:
- WaitForObject()
- Click() – on objects or coordinates
- Tap() – on objects or coordinates
- Swipe()
- HoldButton()
- PressKey()
In the hierarchy area, only WaitForObject() can be recorded. The element details area is mostly used to generate asserts and to set the text of specific objects. The full list of the available commands and how to obtain them can be found here.
Finish the recording of steps by pressing the red Recording button.
Second, in the Recording language dropdown, choose Python or Robot and the Run button will appear allowing you to replay the test.
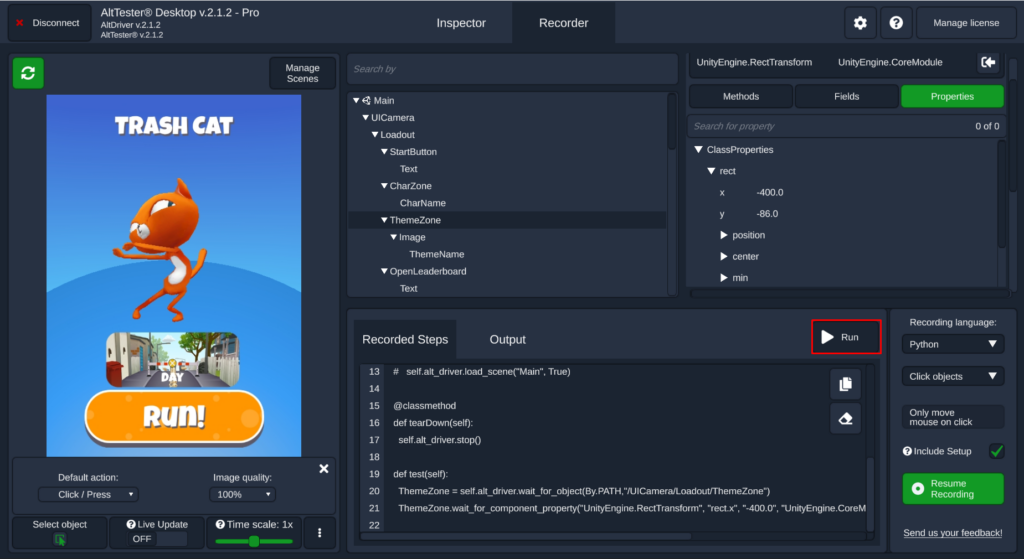
In case this is your first time running the test from AltTester® Desktop, it will take a couple of seconds to generate the setup on your computer.
After executing the test successfully, the results will be displayed under the Output section.
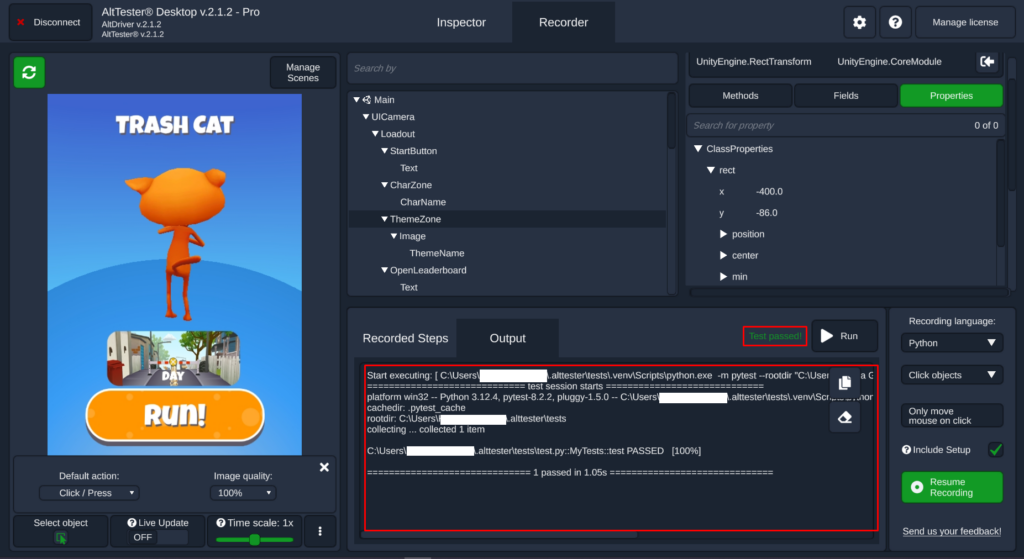
Both the Recorded Steps and the Output section have a Copy button; this way, the tests can be copied into a suite of tests or can also be modified if needed.
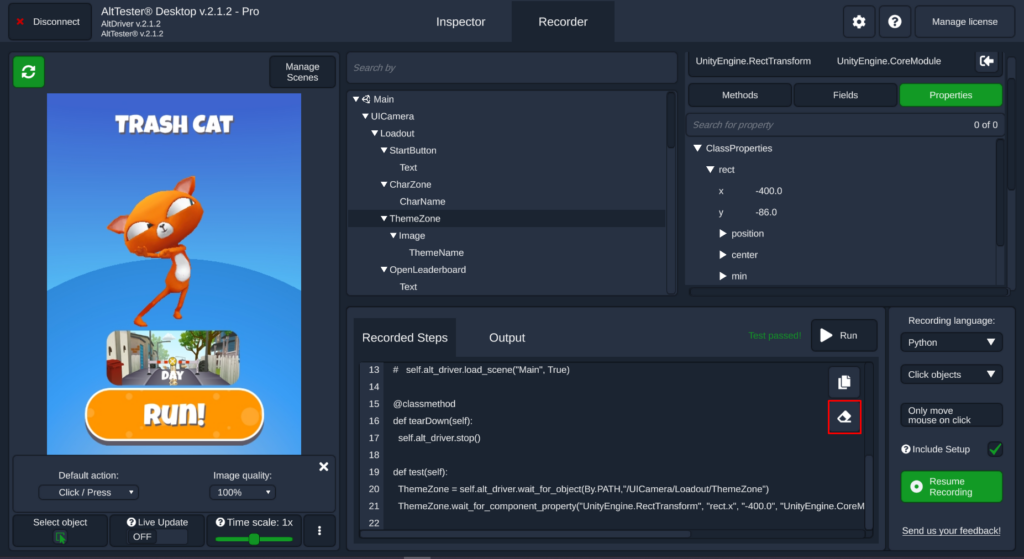
The Erase button can be used to clear the recorded steps and the output (it does not delete the file containing the test that is saved on the computer).
Finally, the Settings page has now an extra option to change the location to which the replayed tests and the outputs are saved.
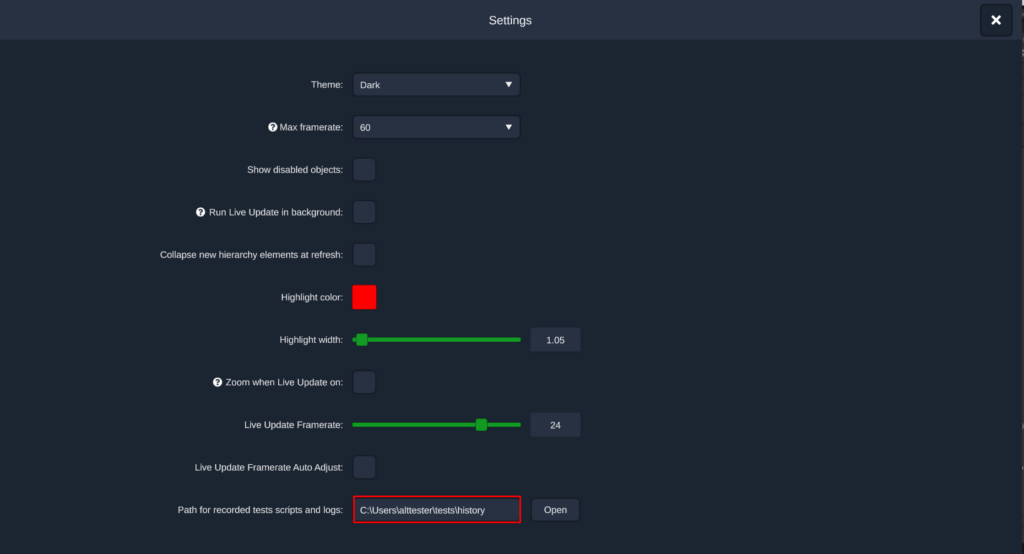
The default path is “C:\Users\USERNAME\.alttester\tests\history” on Windows and “/Users/USERNAME/.alttester/tests/history” on MacOS.
In the “/tests/history/” folder you’ll find time-stamped folders, each containing the test file and the output file for all of the recorded tests that were replayed.
Note: Sometimes the setup will not finish successfully when you hit the Run button for the first time, and an error will be displayed. To fix this issue, you’ll have to install Python yourself, add it to the PATH environment variable and restart the AltTester® Desktop. After doing so, AltTester® Desktop will search for the necessary dependencies and you’ll be able to replay the recorded test with the Run button.
Join us on Discord!
We’d love to continue the conversation and connect with you directly. Join our growing community on Discord, where you can ask questions, share insights, and stay updated with the latest news and discussions. See you there!
Check out our documentation for in-depth technical information.
Happy test-replay!
