- What does AWS Device Farm offer?
- How to run C# tests on AWS Device Farm
- AltTester Desktop running in an AWS Instance
- Step-by-step instructions for running tests on Android
- Conclusions
If you are writing automated tests in C# using AltTester and want to run your tests against the devices from AWS Device Farm, this article offers the instructions to do so. From preparing the codebase by adding Appium, to preparing an instance that runs AltTester Desktop, you will find all relevant information for setting up your test run.
Using cloud services for mobile application testing provides testers with the flexibility, scalability, and resources needed to thoroughly test an application on a wide range of devices and scenarios, leading to a higher quality end product. The following are the main reasons we looked into running our tests in a cloud service:
- Device Diversity: Cloud services provide access to a wide range of mobile devices with varying screen sizes, operating systems, and configurations.
- Automated testing: Cloud services support integration with popular testing frameworks, allowing testers to set up automated test scripts that run on various devices.
- Maintenance and updates: Cloud services handle the maintenance and updates of the testing infrastructure, ensuring that the devices are up-to-date with the latest operating systems and software versions.
What does AWS Device Farm offer?
AWS Device Farm is an application testing service that offers the option to configure a test run and run your tests against a device pool at once.
As described on the official website, Device Farm is a service that “enables you to run your tests concurrently on multiple desktop browsers or real devices to speed up the execution of your test suite, and generates videos and logs to help you quickly identify issues with your app”.
AWS Device Farm offers mainly a server side solution, which means all the testing configuration needs to be done on a Virtual Machine offered by AWS.
How to run C# tests on AWS Device Farm
AWS Device Farm does not offer an out of the box solution for running tests written in C#, since it doesn’t have an option for it, like in the case of Java or Python, for which there are Test Framework options available. However, using the Appium-Ruby configuration from the test-type selection, allows the upload of the tests written in C# as a zipped folder.
The application tested is TrashCat, instrumented with AltTester Unity SDK v2.0.1, used in multiple examples, and for which we already have a set of C# tests. The testing project is structured as a Page Object Model and uses .NET6 as a Target Framework. It has NUnit and AltTester Driver v2.0.1 integrated.
Because the application is instrumented with AltTester Unity SDK v2.0.1, AltServer is no longer integrated in the instrumented application. In order to connect to AltServer, AltTester Desktop needs to be running and accessible from the devices running inside the AWS Device Farm.
You can connect to AltTester Desktop in two ways:
- A remote connection
AltTester Desktop is opened in a remote location (e.g. a virtual machine in the cloud) from where it can be accessed through IP/URL.
For the purpose of the article AltTester Desktop was installed on an AWS instance. You can connect with the application through IP/URL. In this case, during instrumentation, you need to specify the IP/URL as the AltServerHost .
This works for both Android and iOS.
- A local connection
AltTester Desktop is installed on the AWS Device Farm VM. Therefore a localhost connection is established, so there is no need for setting the host during instrumentation. A license for running the application in batch mode is needed as well, which is stored separately in license.txt (Be aware to not make this file public). For an AltTester Desktop Linux build, please go to this link.
The local connection works only for Android. Unfortunately, IProxy does not have a way of setting up reverse port forwarding.
Regardless of the test configuration, there are four stages needed in order to be able to run tests on Device Farm:
- Preparing the application
- Preparing the test code
- Preparing the .zip folder containing tests and necessities
- Preparing Configuration File
In the following lines, we’ll go through each stage in detail, with subsequent step-by-step instructions and relevant references.
1. Prepare application
Instrument the TrashCat application using AltTester Unity SDK v2.0.1. For additional information you can follow this tutorial.
Based on the your option to connect to AltTester Desktop you need to set AltServer Host to
- localhost(127.0.0.1) – for local connection
- IP/URL provided by the AWS instance where AltTester Desktop is running -for remote connection
2. Prepare test code
Use the accepted .NET version
When trying to install .NET 7.0, for running tests on Android, the error “Cannot get required symbol SSL_set_alpn_protos from libssl.” was displayed. The solution found consists in downgrading .NET to version 6.0. This seems to be related to the OS version the available AWS Virtual Machine is using.
<TargetFramework>net6.0</TargetFramework>Install necessary packages
In order to set up Appium the following packages need to be installed in your project:
<PackageReference Include="Appium.WebDriver" Version="4.4.0" />
<PackageReference Include="Selenium.WebDriver" Version="3.141.0" />
You can do this by running the following commands in your project`s terminal.
dotnet add package Appium.WebDriver --version 4.4.0
dotnet add package Selenium.WebDriver --version 3.141.0
Add Namespaces specific for Appium
using OpenQA.Selenium.Appium;
using OpenQA.Selenium.Appium.Android;
using OpenQA.Selenium.Appium.iOS;
using System.Net;
Create BaseTest Class
This class serves as the parent class for test cases. All other test pages will inherit it. It contains methods for setting up and tearing down the Appium driver.
Appium driver declaration
| Android | iOS |
|---|---|
AndroidDriver<AndroidElement> appiumDriver; | IOSDriver<IOSElement> appiumDriver; |
Define Appium Capabilities
The Appium capabilities needed are minimal. With just a few parameters it covers the options for running on the device.
| Android | iOS |
|---|---|
capabilities.AddAdditionalCapability("device", "Android"); capabilities.AddAdditionalCapability("platformName", "Android"); capabilities.AddAdditionalCapability("appActivity", "com.unity3d.player.UnityPlayerActivity"); | capabilities.AddAdditionalCapability("device", "iOS"); capabilities.AddAdditionalCapability("platformName", "iOS"); capabilities.AddAdditionalCapability("appPackage", "fi.altom.trashcat"); capabilities.AddAdditionalCapability("autoAcceptAlerts" ,true); |
The autoAcceptAlerts capability for iOS handles the operating system pop-ups. By setting it to “true” we are providing access to the application for some required permissions.
Driver initialization and wait
Because the Appium Server will be running in the same environment as the tests, we can leave the appiumUri to be the localhost default port.
var appiumUri = new Uri("http://localhost:4723/wd/hub");| Android | iOS |
|---|---|
appiumDriver = new AndroidDriver<AndroidElement>(appiumUri, capabilities, TimeSpan.FromSeconds(300)); | appiumDriver = new IOSDriver<IOSElement>(appiumUri, capabilities, TimeSpan.FromSeconds(300)); |
After the specified timespan Appium will close. This value can be adapted based on your needs.
Cleanup
The DisposeAppium teardown method is called after the tests are complete. It quits the Appium driver.
If you plan to use remote connection in order to connect to AltTester Desktop, don`t forget to add the IP/URL of the remote VM when defining AltDriver:

All code changes can be viewed in the github repository.
3. Prepare the .zip folder containing tests and necessities
The uploaded .zip file contains the Test Scripts, which will interact with the application and perform the necessary tests and other dependencies needed for the configuration of the Test Environment. You can find the test project in the GitHub repository.
If you choose to run AltTester Desktop in a local connection, please add the AltTesterDesktop build here, as well as a license.txt file, which will store your AltTester Desktop PRO license, needed to run batch mode commands. If you only have 1 seat per license please remove the activation in other places before using it here.
Because of the upload validation you need to select everything you want to upload, click right and select “Compress to zip file”.

4. Prepare Configuration File
For a custom test environment you can edit the default configuration file by adding the needed commands. The commands are written as YAML so there are some validations for them.
Using the commands from the configuration file you can access the contents of the uploaded .zip folder, install applications and ultimately run your tests.
The Appium part can be left as default. Keep in mind that the setup is different for Android and iOS.
.NET 6.0 installation
- curl -O -L https://dot.net/v1/dotnet-install.sh
- chmod +x ./dotnet-install.sh
- bash ./dotnet-install.sh --channel 6.0
- export PATH=$PATH:$HOME/.dotnet
- dotnet -- version
Install necessary packages for running the C# tests
- dotnet add package NUnit --version 3.13.3
- dotnet add package AltTester-Driver -- version 2.0.1
- dotnet add package Selenium.WebDriver -- version 3.141.0
- dotnet add package NUnit3TestAdapter --version 4.4.2
For running tests, just add the dotnet command.
- dotnet testStart AltTester Desktop in batch mode on VM when running tests for Android on a local connection
If you choose to upload the AltTester Linux build in the .zip folder, here are the commands needed in the Configuration file to run AltServer in batchmode. You can choose to include these commands in your test code or add it in the Test Configuration file.
- export LICENSE_KEY=$(cat license.txt)
- cd AltTesterDesktopLinuxBatchmode
- ./AltTesterDesktop.x86_64 -batchmode -port 13000 -license $LICENSE_KEY -nographics -termsAndConditionsAccepted &
The “&” symbol is used to make the application run in background. Failure to add the symbol will cause the commands following it to not be triggered.
You also need to add port reverse forwarding when running on Android:
- adb reverse -- remove-all
- adb reverse tcp:13000 tcp:13000
Don’t forget to remove the license activation after each run.
Update October 13th, 2023: We have updated the removing of license activation commands (lines 2 and 3 of code text below).
- cd AltTesterDesktopLinuxBatchmode
-  kill -2 `ps -ef | awk '/AltTesterDesktop.x86_64/{print \$2}'`
- ./AltTesterDesktop.x86_64 -batchmode -nographics -removeActivation
AltTester Desktop running in an AWS Instance
A way to connect to AltServer, within the AltTester Desktop application is by installing AltTester Desktop on an Amazon EC2 Instance. The details of creating an EC2 Instance are out of scope for our current tutorial.
However, it’s important to take into account a few aspects in order to have a successful connection, detailed in the five steps below.
- Create a Windows instance
If you want to use the AltTester Desktop Community edition you need to use Windows. If you have a PRO subscription, you can use Linux and run commands in batch mode.
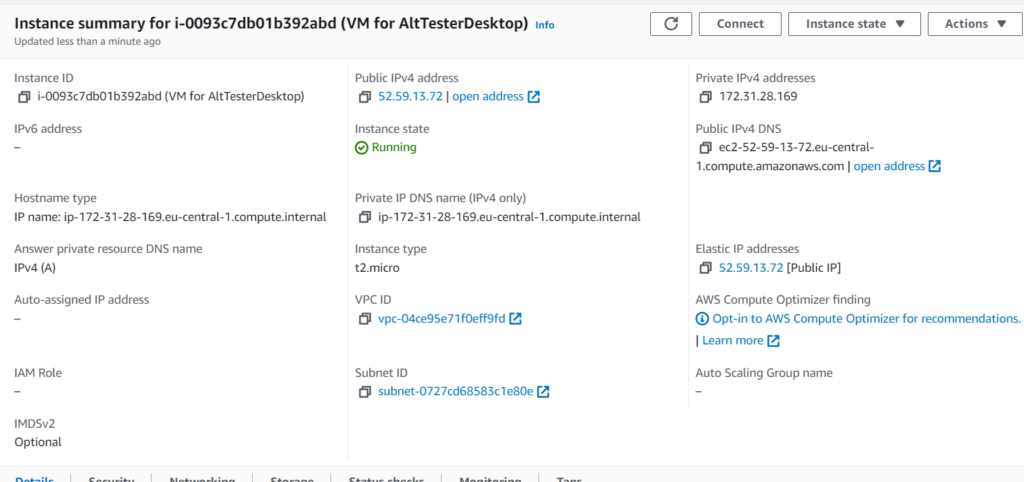
- Add Inbound rule to Security Group to make port 13000 accessible

The custom TCP on port 13000 is needed to have the connection to AltTester Desktop default 13000 port.
- Connect to the Instance through Remote Access Connection
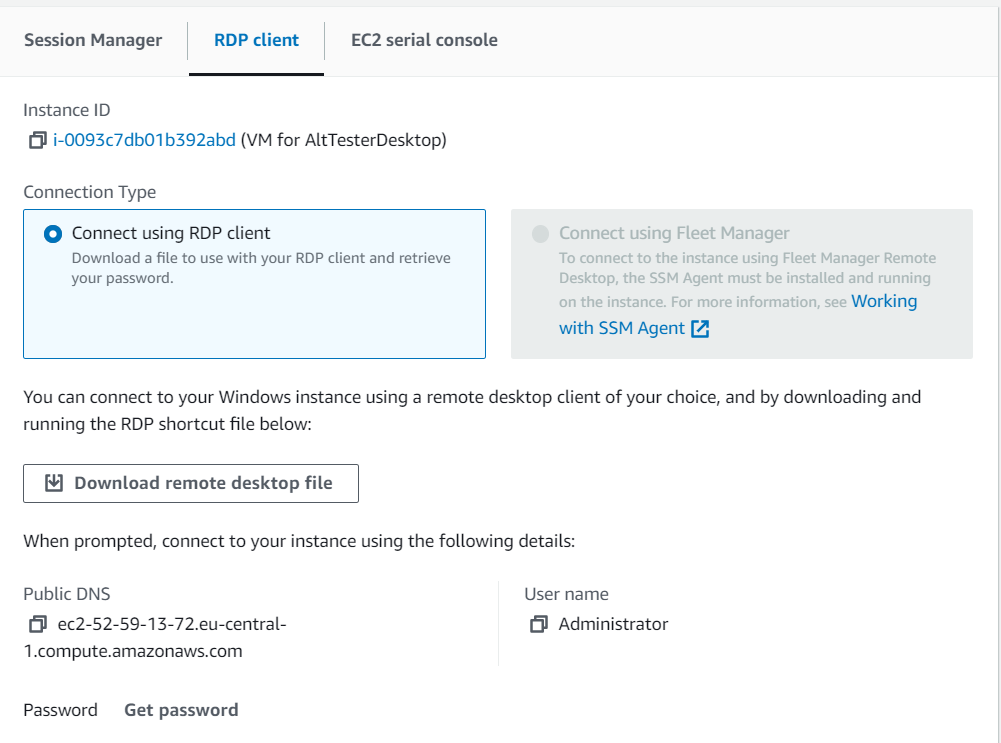
- Download AltTester Desktop for Windows and install it on the instance
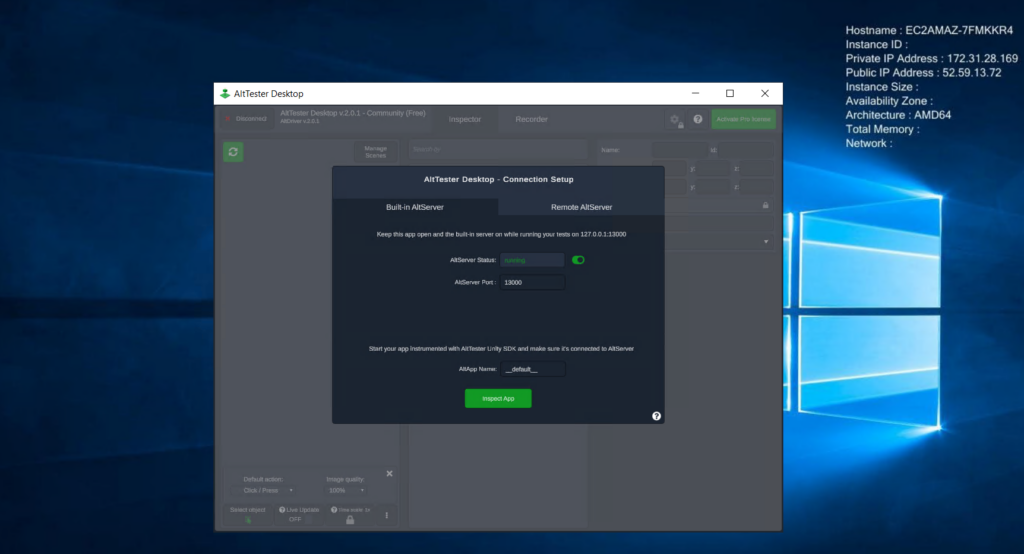
- Associate an Elastic IP, so that the IP remains constant after each opening of the instance
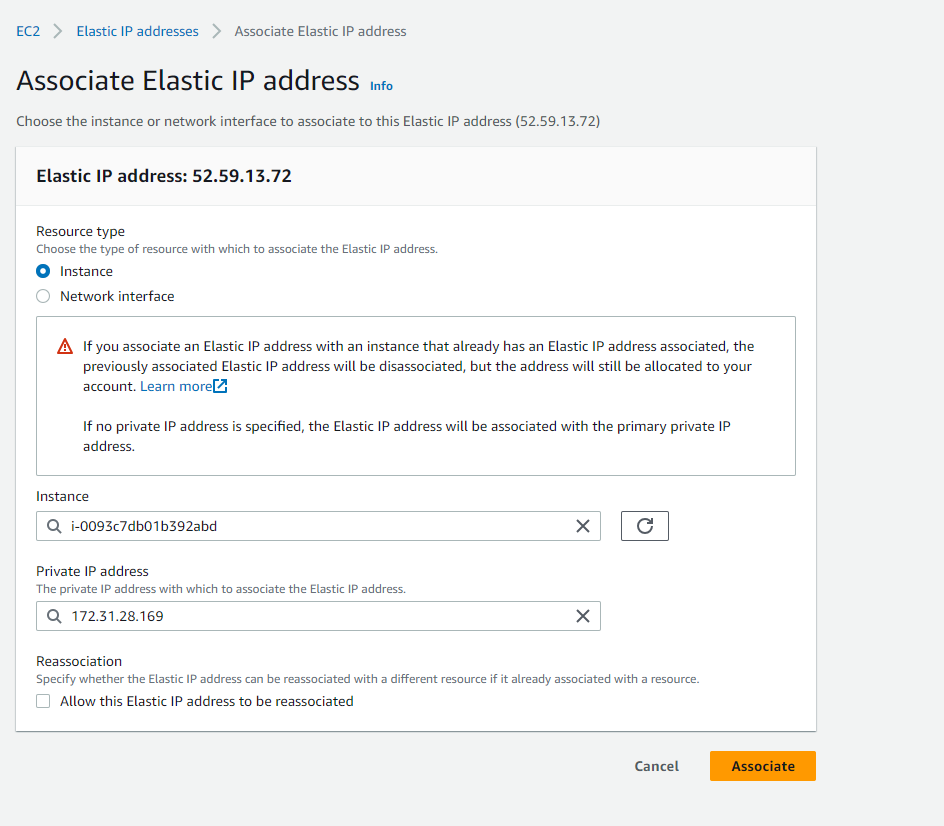
💡 Note: Please make sure to deactivate any Firewalls on the Windows VM, as it might block the connection.
Step-by-step instructions for running tests on Android
Please note that the process of running the tests is similar for iOS or Android. The differences are described above.
Moving forward, the instructions and resources will be for running tests on Android, for an application instrumented with AltTester Unity SDK v2.0.1 with a specific host (the elastic IP address provided when creating a remote connection), so that we can connect to it from an AWS Instance (remote connection).
Important notes when starting a new automated run:
- The remote connection needs to be open
- AltTester Desktop has to be running
Access AWS Device Farm
Open Device Farm from your AWS account and create a new project, as instructed here.
Create a new run
The following steps match the instructions for creating an automated tests run.
- Choose application
Add the instrumented application build.

After upload you will see the application details:
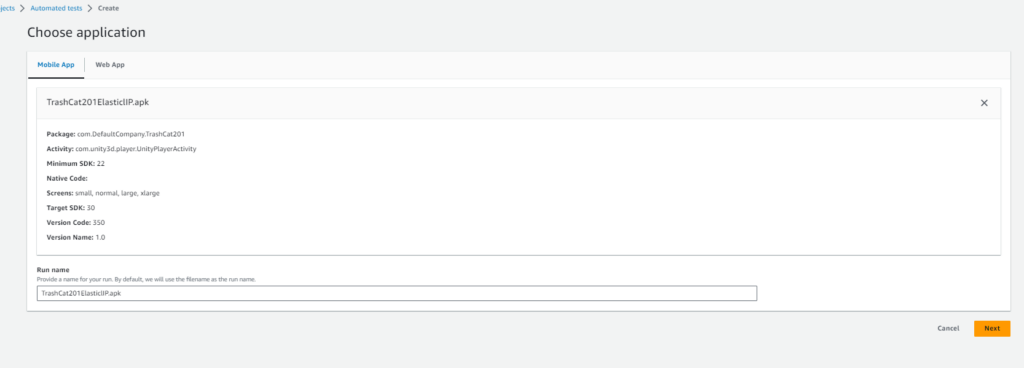
The details from Package and Activity are the ones needed in the Appium Capabilities from BaseTest.
- Configure
Choose Appium Ruby when configuring the Test Framework.
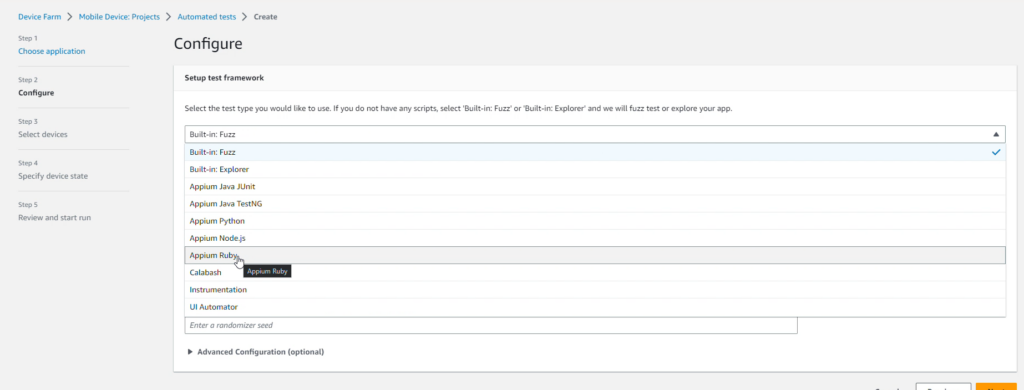
When selecting the test framework, you are required to upload the .zip folder containing your tests. Because C# is not a supported framework, there is no option for that. The reason why Appium Ruby is the selected Test Framework is that other setups have stronger validation for the contents of the .zip folder and would mark the uploaded folder as invalid, making it impossible to move forward in the process.
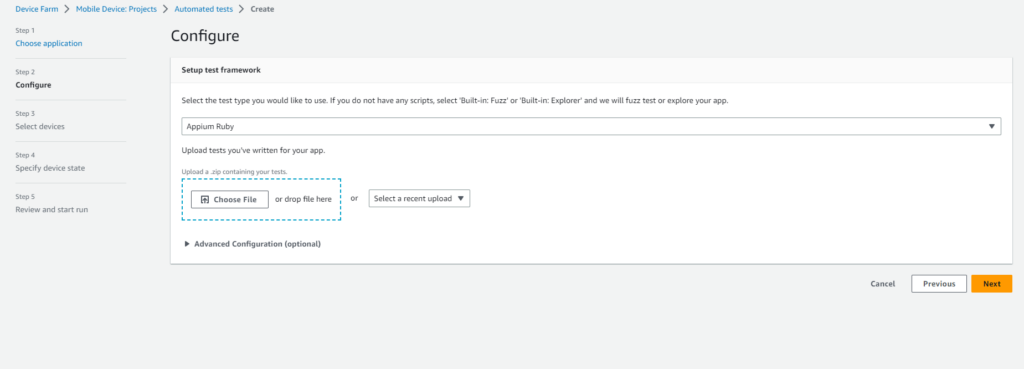
After uploading the .zip file, it will be validated, and if the validation is successful, a default TestSpec for AndroidAppium Ruby v.4.0 will be displayed.
By selecting Create a TestSpec, you are able to customize the YAML file so that it matches your demands.
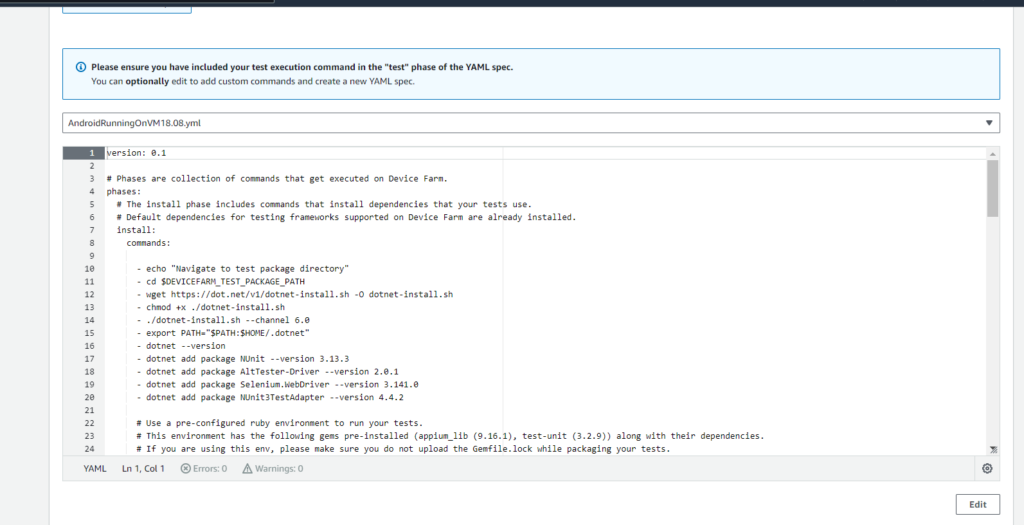
Edit the default YAML in order to add the necessary commands, described in the preparation step and then save the file.
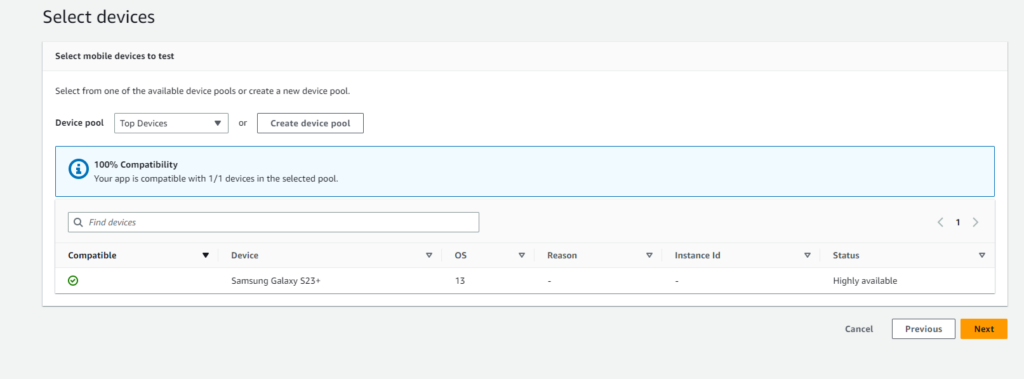
- Select Devices
Select next and choose a compatible device.
Device Farm offers the option to run tests concurrently on a pool of devices of your choice.
This means there will be multiple instances of AltDriver with the same AppName wanting to connect to AltServer at the same time.
💡 Note: At the moment AltServer is unable to differentiate between applications with the same AppName. Therefore, we recommend running the tests on one device only. Make sure you keep an eye on future AltTester upgrades.
- Specify device state
For the current test setup you can set the device state as its default.
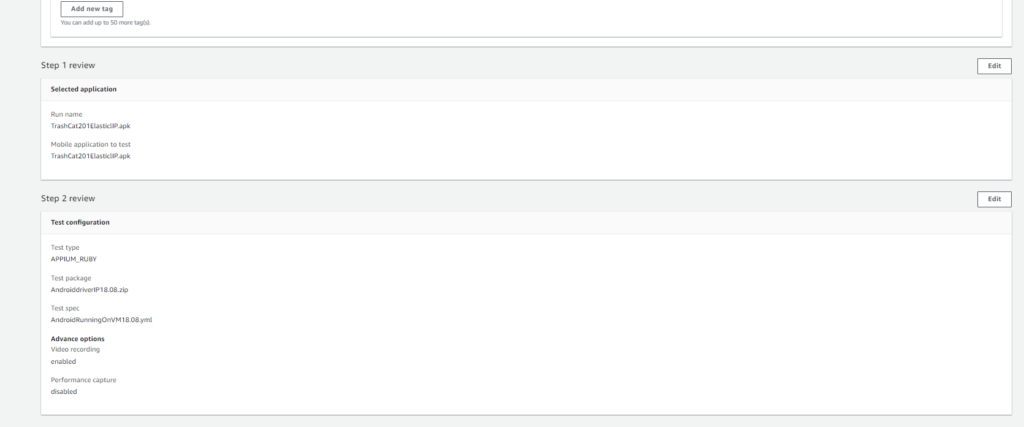
- Review and start run
Once you review the run settings and everything is in order, select Confirm and Start Run.
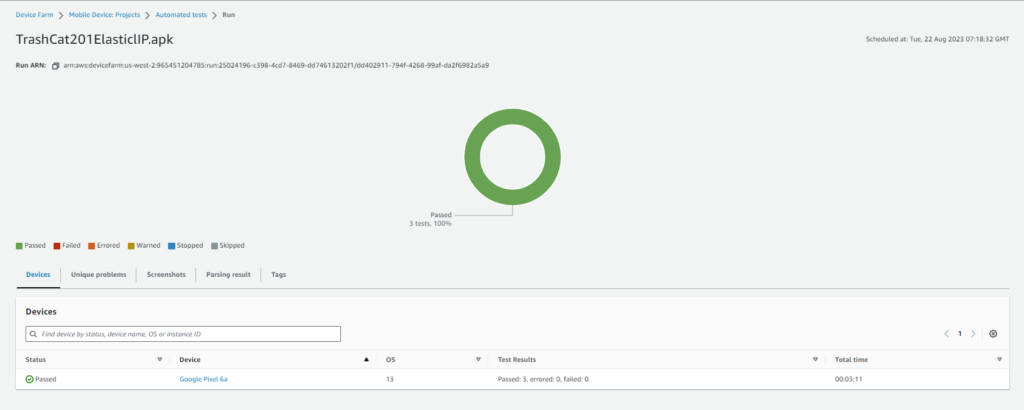
Test Results
The result will be shown in a list.

And once the status is available you can get more details by selecting the application name.
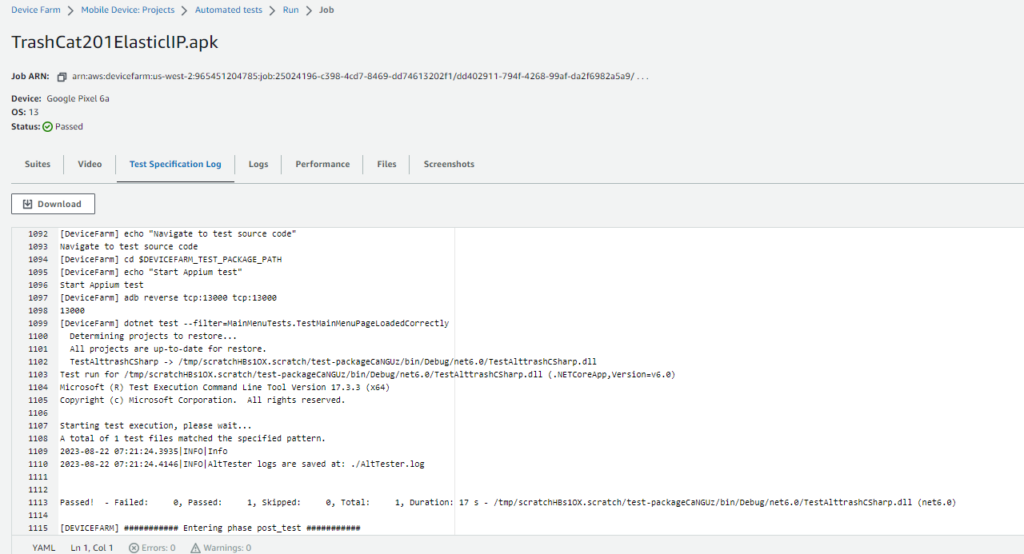
For more details and logs you need to access the device:
Conclusions
Running tests written in C# is a possibility in AWS Device farm, but because there isn’t an explicit option for it, it can be time consuming to install .NET for each run. In other test configurations, there is no need to provision and manage the testing infrastructure.
Once you have a stable configuration you can take full advantage of testing your Unity application in AWS Device Farm. Using AltTester Desktop to connect to the instrumented application is easy. If you have any questions regarding this process, feel free to contact us on Discord, or look into AltTester Unity SDK and AltTester Desktop documentation.

For anyone who reads this article, just small update (FYI) AWS Device Farm supports the .net 8.0
(tested, confirmed)