

- Update AltTester Driver NuGet package
- Download AltTester Desktop
- Instrument TrashCat with AltTester Unity SDK v.2.0.x
- Running the tests with the 2.0.x versions
- Running tests on two applications connected to the same AltServer
- Takeaways
There was a lot of excitement lately around the big update to v2.0.0 for AltTester Unity SDK and AltTester Desktop. These versions include a lot of useful new features, like the Recorder and support for WebGL. If you want to know more about the latest release, you can check out this blog post.
For those new features, and in order to keep our example projects up to date, we’ve upgraded TrashCat from version 1.8.2 to version 2.0.1. This article is meant to be a walkthrough of the upgrading process, so join us in the journey of improving our project.
What is TrashCat?
TrashCat is one of Unity’s sample games and it is also a game used in many of our available examples, which we encourage you to check out, if you plan to use our test automation tools in your next project.
For running tests on TrashCat, the most useful new features for us are:
- Recorder – helpful when drafting a new test. The objects are identified by PATH and actions are recorded, so it’s easy to declare the Objects in Pages and shape the recorded steps into a suitable test.
- Multiple drivers connecting to a single AltTester Desktop PRO – which makes running tests on more than one instance of the application easier. Our tests were designed to be platform agnostic, so it’s easier now to run them on multiple platforms at once.
The codebase for EXAMPLES-TrashCat-Tests is available on GitHub. We kept the original test code running with AltDriver 1.8.2 on TestsFor1.8.2 branch and created a separate branch for showing changes necessary brought by upgrading to the latest version.
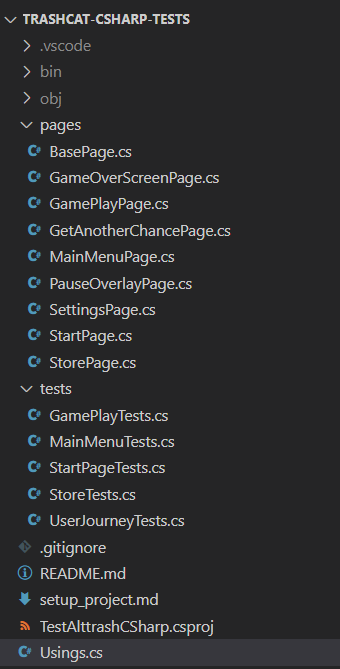
Here is a bit of context about our project, the versions we use and how the files are organized:
- The tests were created in C# using AltTester Driver v1.8.2
- Used NUnit version 3.13.3 and .NET 7.0
- Organized in a POM structure like this:
The upgrade from v1.8.2 to v2.0.x consists of three very important steps:
- Update AltTester Driver NuGet package
- Download AltTester Desktop
- Instrument the app with AltTester Unity SDK v.2.0.x
1. Update AltTester Driver NuGet package
We started out by updating the Driver within our tests, with a simple command line:
dotnet add package AltTester-Driver –version 2.0.x
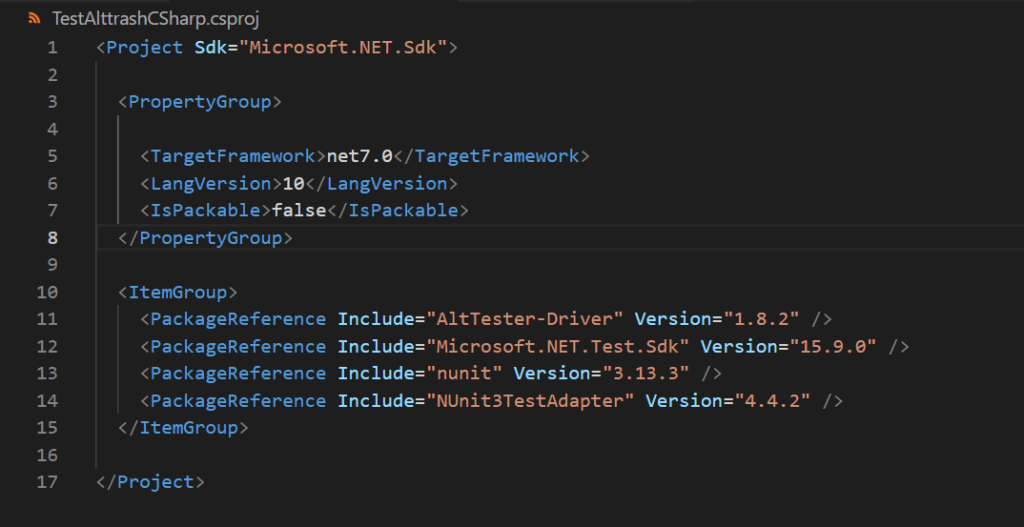
This is the change we expected in TestAlttrashCSharp.csproj:

After the import finished, there were a lot of errors stating:
The type or namespace “AltObject” could not be found (are you missing a using directive or an assembly reference?)
“ Write and execute first test” section of our documentation mentions that the namespace of all AltTester classes changed into :
using AltTester.AltTesterUnitySDK.Driver;
All errors were fixed when this namespace replaced the old one.

2. Download AltTester Desktop
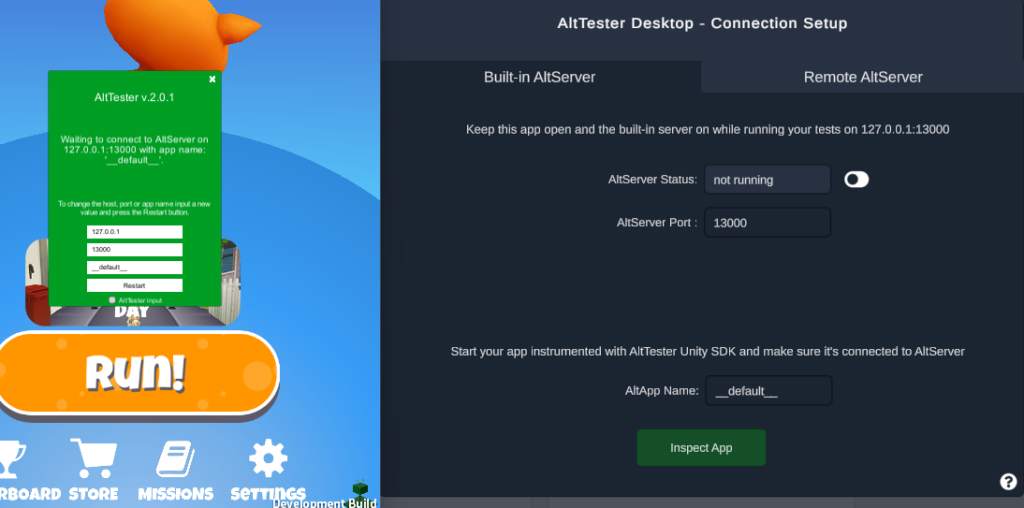
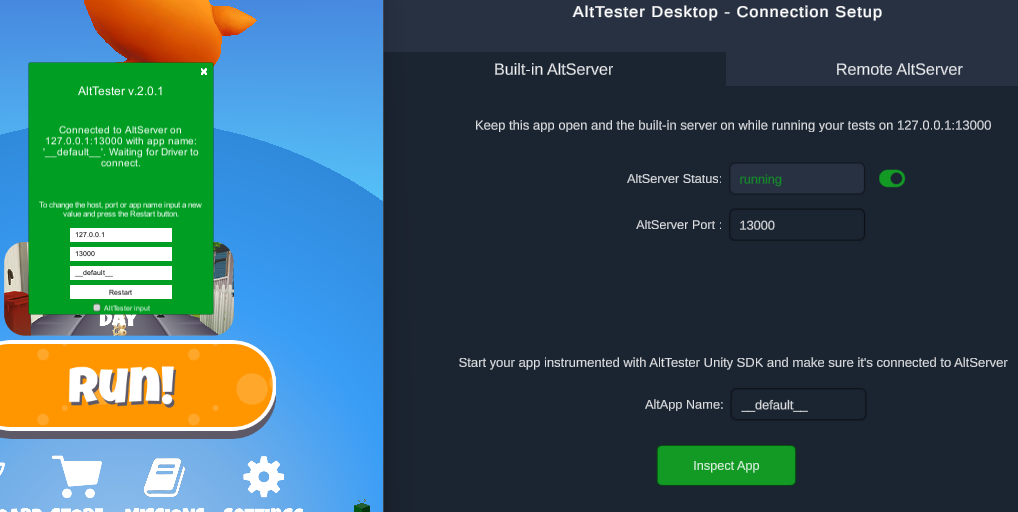
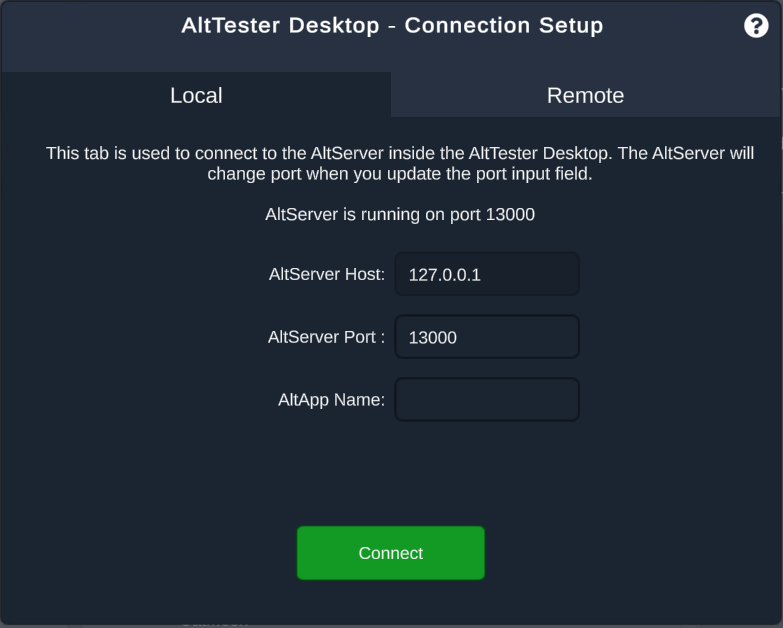
One of the architectural changes from v2.0.0 is that the AltServer module is incorporated in AltTester Desktop. In order to be able to execute tests, we need to have AltTester Desktop running so that the AltDriver can connect to the local server.
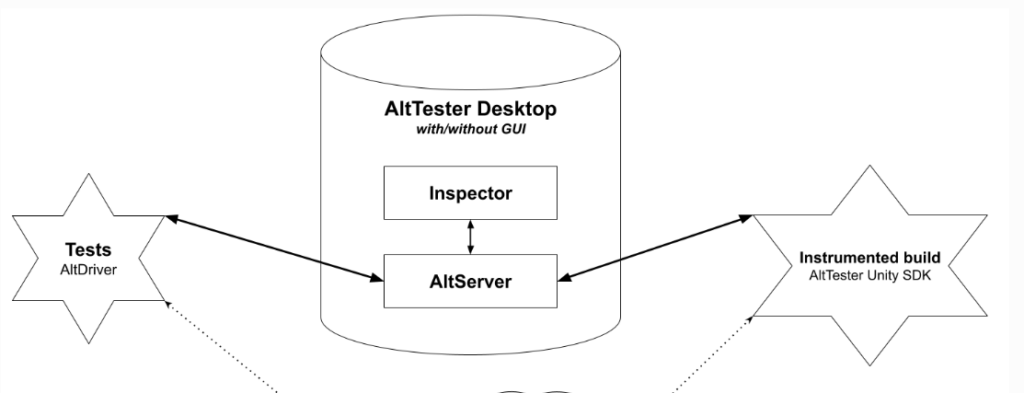
For that, we needed to download and start the new version of AltTester Desktop from AltTester website.
3. Instrument TrashCat with AltTester Unity SDK v.2.0.x
In case you don’t plan on instrumenting applications and want to use our already instrumented sample builds, skip this section and go directly to Running the tests with the 2.0.0 version.
The endless runner application we instrumented is available on Unity Asset Store.
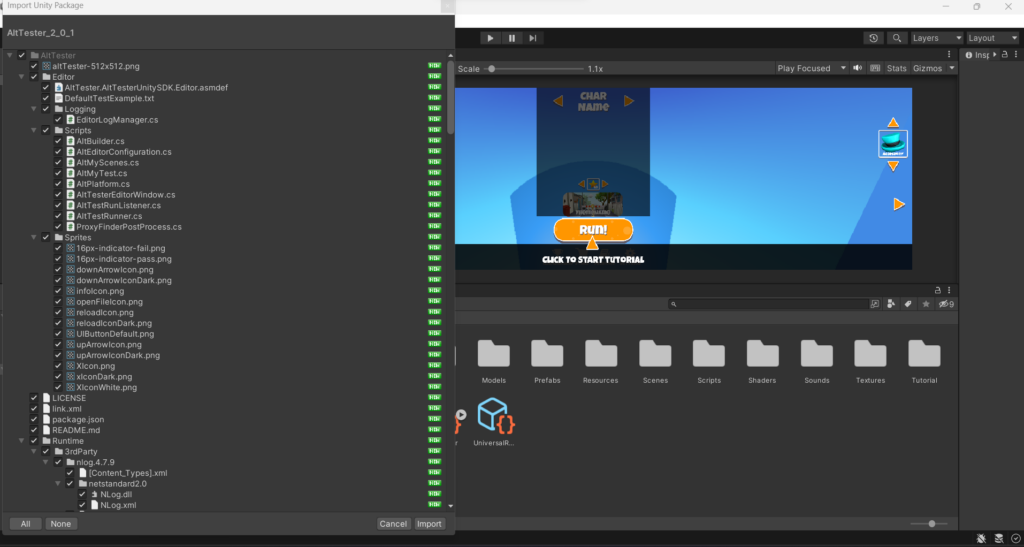
We imported the application packages in a Unity Project and followed the steps from our docs section called Instrument your app with AltTester Unity SDK.
Solving necessary dependencies
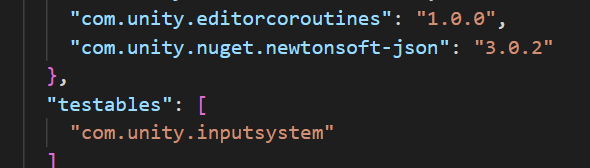
After the package was successfully imported the following errors were raised:

In order to resolve them, we checked the required dependencies for the current version and added them within the manifest.json file of the project.
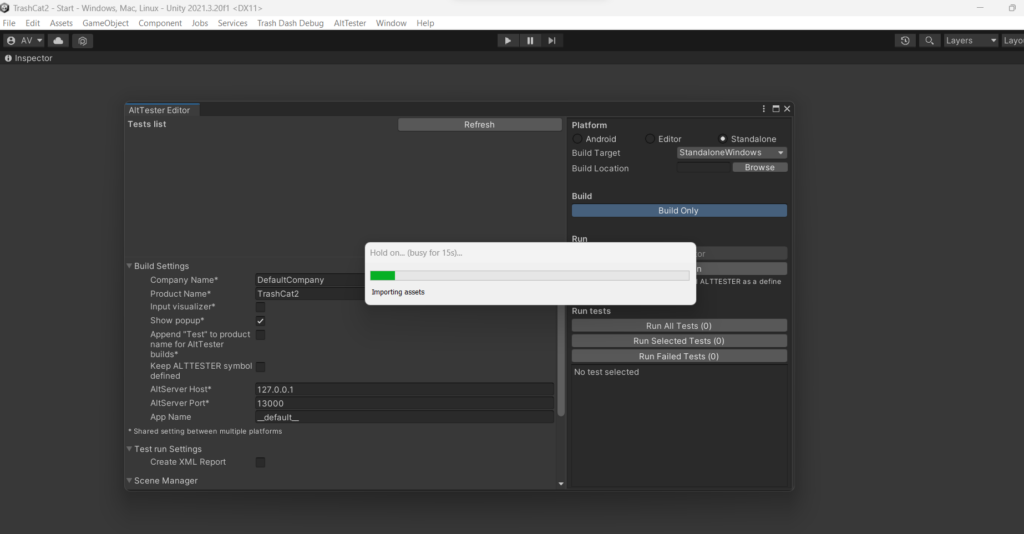
Building the application using AltTester Editor is very straightforward. Just select the building option (Build Only) and the desired platform (Standalone).
The rest of the input fields can remain prepopulated, as they have all the necessary information for a Standalone application to be successfully built.
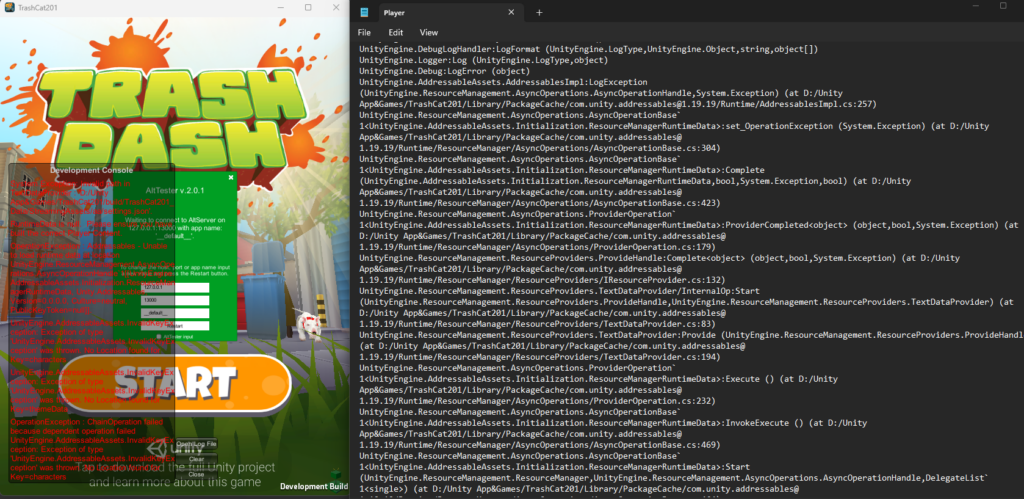
The creation of the executable was successful, but there were Console Errors on run and some content of the application was not fully displayed:
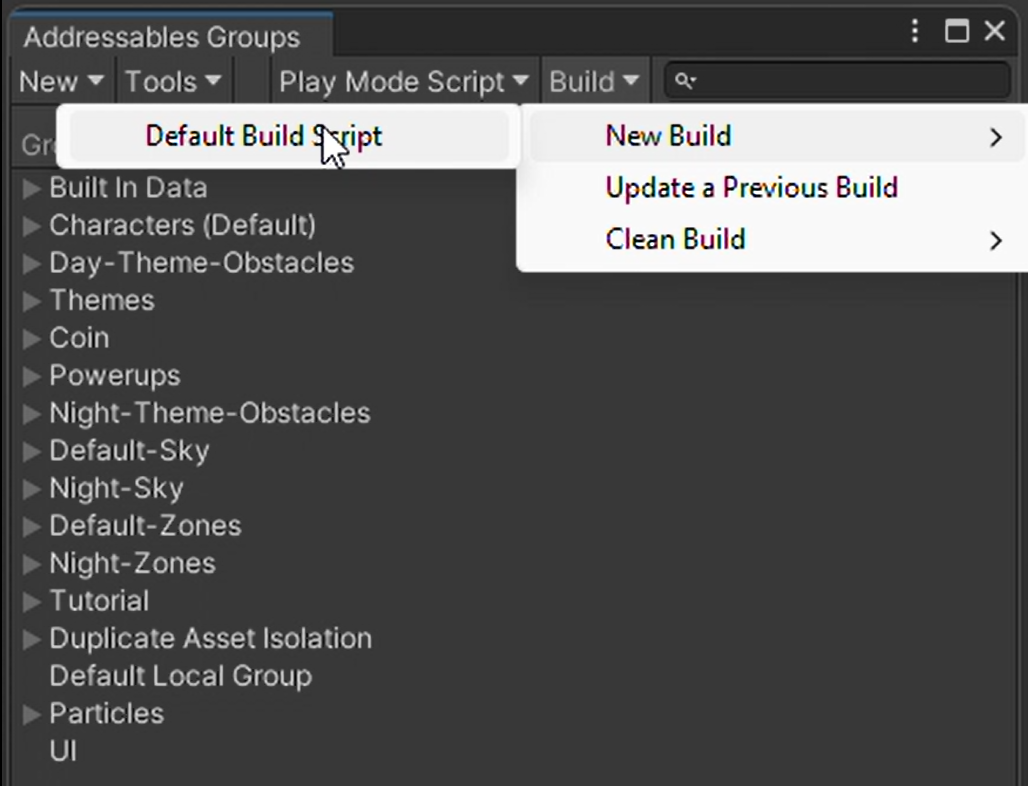
Build addressables before building instrumented application
The assets of this project are structured as an Addressable Asset System. This calls for a separate Addressable build, before building the application itself. Just select Default Build Script to start it.
UnityEditor -> Window -> Asset Management -> Addressables -> Groups.
Select from Build->New Build-> Default Build Script
After the addressables were successfully built, a new Application Build needs to be created using AltTester Editor.
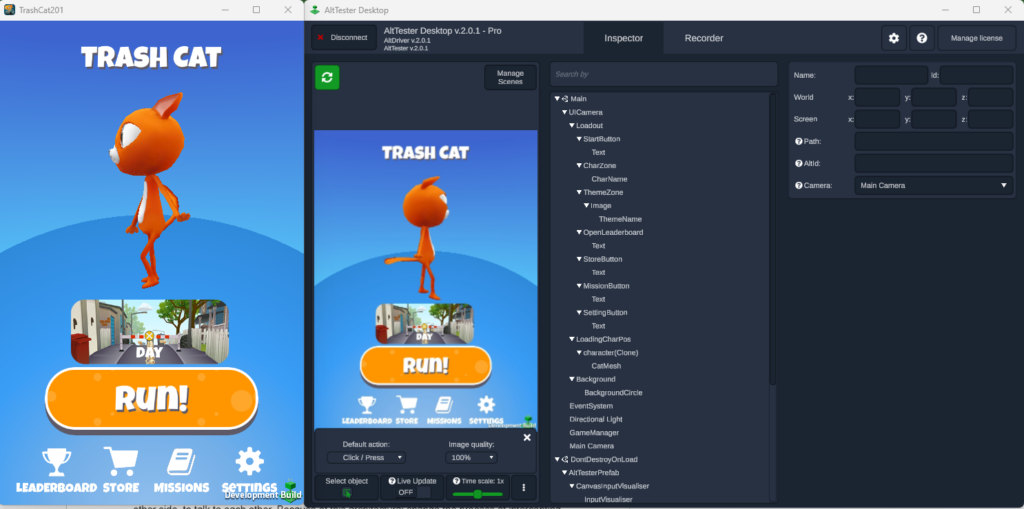
The newly-instrumented game is running smoothly now. AltServer connects automatically with the instrumented build. Selecting Connect in AltTester Desktop displays the game elements in the Inspector.
In order to enhance the debugging and analysis capabilities of our software, we have successfully created instrumented builds for two major platforms: Windows and Android. You can find them on github, branch TestsFor2.0.1
4. Running the tests with the 2.0.x versions
Here’s a summarized version of the steps to run tests with AltTester on a newer version of the AltTester Unity SDK on Windows:
- Download AltTester Desktop for Windows and AltTester Unity SDK.
- Install AltTester Desktop for Windows
- Use the latest version of AltTester Unity SDK when instrumenting your application.
- Open AltTester Desktop to make sure the AltServer is up and running.
- Launch the instrumented app built with the newer AltTester Unity SDK.
- Check that the panel of the instrumented displays: “Connected to AltServer on … Waiting for AltDriver to connect.”
- Run tests with an updated AltTester-Driver.
Running tests on Android against a build instrumented with AltTester Unity SDK v1.8.2 and another one with AltTester Unity SDK v2.0.x is slightly different. The AltTester Desktop 2.0.x app offers a free local server that is used by the app/game, on one side, and AltTester Desktop App or the automated tests, on the other side, to talk to each other. Because of this architectural change, the process of intercepting data traffic and redirecting it can be achieved like this:
5. Running tests on two applications connected to the same AltServer
A new feature available with PRO license is the ability to connect AltServer with multiple instances of the same application.
For that, we need two applications that have different names.
You can set that when instrumenting the build in AltTester Editor by updating the AppName input field.
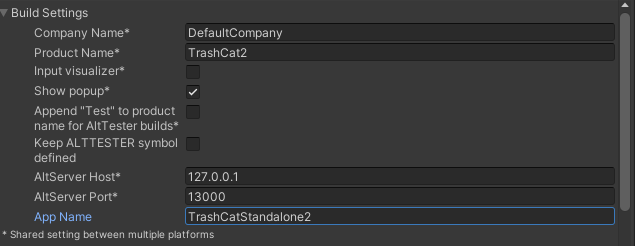
Or from the Control Settings Panel, after opening the application. Don`t forget to restart AltTester after updating the name.
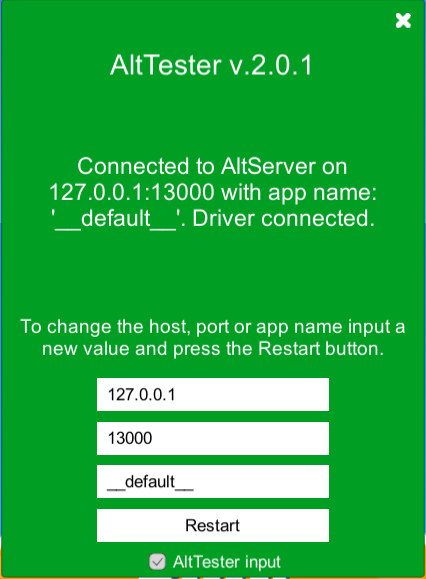
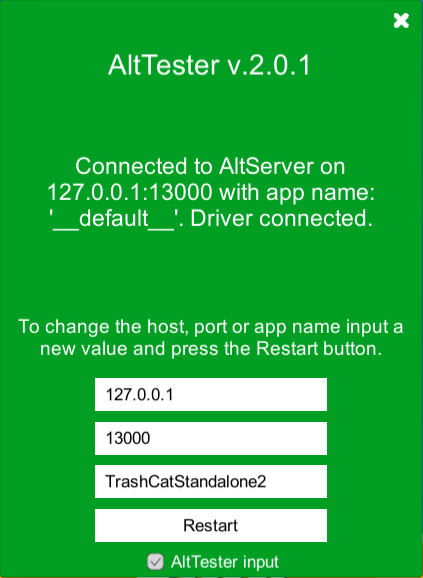
The AltApp Name from AltTester Desktop panel is relevant ONLY if you want to connect the game to Inspector.
When running the tests, however, you also need two instances of AltDriver, each defined by the application name:

You have two options for running your tests: either concurrently on both games using two instances of TestScripts, each with its own driver, or sequentially by running all tests on one driver and then on the other one.
Check out this short video showcasing running tests in parallel.
6. Takeaways
We hope that sharing our upgrade process will serve as an encouragement for you to try the newest version of AltTester. Through our experience, we have demonstrated that upgrades can be executed smoothly and seamlessly, without the need to update existing tests.
This showcases the compatibility and stability of the latest version, providing you with enhanced features and improved testing capabilities. By embracing the newest version, you can leverage the advancements AltTester has made, benefiting from their commitment to delivering a reliable and user-friendly testing framework.
We encourage you to take the leap and explore the newest version of AltTester, confident in the knowledge that a successful upgrade is within your reach.
If you have any questions, you can always reach us on Discord. Don’t forget to check out our documentation for further information.