If you are interested in running automated tests using AltTester® Unity SDK on WebGL app under various browsers on BrowserStack cloud service, take a look at this article. We have prepared a set of instructions and steps to guide you through a successful run on BrowserStack Web Automate. We also offer an example repository for better understanding the presented steps.
How does BrowserStack Web Automate work?
BrowserStack Web Automate is a cloud-based testing platform that helps developers and testers to perform automated testing of web applications on different browsers and operating systems.
We are choosing Web Automate because WebGL applications are hosted by browsers and can be accessed by URL. Plus, we use WebGL quite frequently in integrations for AltTester® together with App Automate.
*** Learn more about integrating App Automate on our blog, in the article Running AltTester-based C# Tests on BrowserStack App Automate.
In our case, the application is hosted by the same local machine that makes the request. In order to achieve this, we are using localhost concatenated with host as our URL.
Introduction to WebGL
WebGL is an abbreviation from Web Graphics Library and is a JavaScript API destined to render high-performance interactive 2D and 3D graphics into any compatible web browser without using plug-ins.
After creating a WebGL build in Unity, you will have a folder with an index.html file and other folders, files and asserts that are mandatory for the game to run. The file index.html is actually a loader file that launches the game and your browser will host it.
Context for our project example
In order to integrate out tests, we used C# tests written for a simple Unity game, TrashCat. This game needs to be instrumented with AltTester® Unity SDK v2.0.2 and create a WebGL build for it.
You can find this project in our repository, along with many other examples.
Running AltTester® Unity SDK tests
Prerequisites
- Test suite – we used EXAMPLES-TrashCat-Tests
- WebGL build
- AltTester® Desktop app installed for running AltServer
- BrowserStack account
- .NET v5.0+ and NUnit v3.0.0+
Steps for running tests on WebGL builds
Step 1: Get BrowserStack credentials
After successfully logging into the BrowserStack account, you can find the credentials in the Access Key section in the BrowserStack Dashboard.

Step 2: Create browserstack.yml
BrowserStack takes essential information from browserstack.yml file. The mandatory parameters are the access credentials (username and access key) and the platforms under which tests are running. You can select this information easily if you follow the steps included in the BrowserStack documentation under section “Integrate Your Test Suite with BrowserStack”. Variable browserstackLocal needs to be True in order to run tests.
userName: YourUsername
accessKey: YourAccessKey
platforms:
  - os: Windows
     osVersion: 10
     browserName: Chrome
     browserVersion: 118.0
browserstackLocal: true
buildName: browserstack-webgl-trashcat
projectName: BrowserStack TrashCat
idleTimeout: 3600
BrowserStack implicit timeout is 90 seconds.If the duration of your tests is over this interval, set idleTimeout to a more appropriate number of seconds.
An automated test session starts concurrently on all the browsers from the selected platforms. Since AltServer v2.0.* version does not currently support running the same tests on more than one browser, the platform property can contain only one object.
Step 3: Create and configure file for integration
In your project, create a class that is inherited by other test classes. For our example, we are referring to the BaseTest class. The purpose of this file is to:
- Initialize AltDriver
altDriver = new AltDriver();You can include this step into the OneTimeSetUp method.
- Configure WebDriver capabilities and set url
DriverOptions capability = new OpenQA.Selenium.Chrome.ChromeOptions();

 capability.BrowserVersion = "latest";
 capability.AddAdditionalOption("bstack:options", capability);

 driver = new RemoteWebDriver(capability);
 driver.Navigate().GoToUrl("http://localhost:<port>/");
<port> is equal with the port choosed for http server to run
DriverOptions’s capabilities are described in Selenium documentation.
This part is also included in the OneTimeSetUp method.
- Quit the Web Driver and stop AltDriver (in OneTimeTearDown)
altDriver.Stop();
            driver.Quit();
Step 4: Start http server
Http server should be started in the folder where the WebGL project is located. This can be done manually in the command line using:
python -m http.server <port><port> parameter is optional, by default is 8000
Step 5: Have AltServer running on local machine
AltTester® Desktop v2.0.0 had a major change by incorporating the AltServer module. With this new change, AltTester® Desktop needs to be running in order to connect tests with your local server. A free version is available on our website.
Step 6: Run the tests
All tests can be started with command:
dotnet testFor running specific tests or classes is recommended to use:
dotnet test --filter YourNamespace.TestClassName.TestNameFor Visual Studio users, a short tutorial on how to integrate your tests is available in the section Integrate your test suite from BrowserStack. Here are the most important steps:
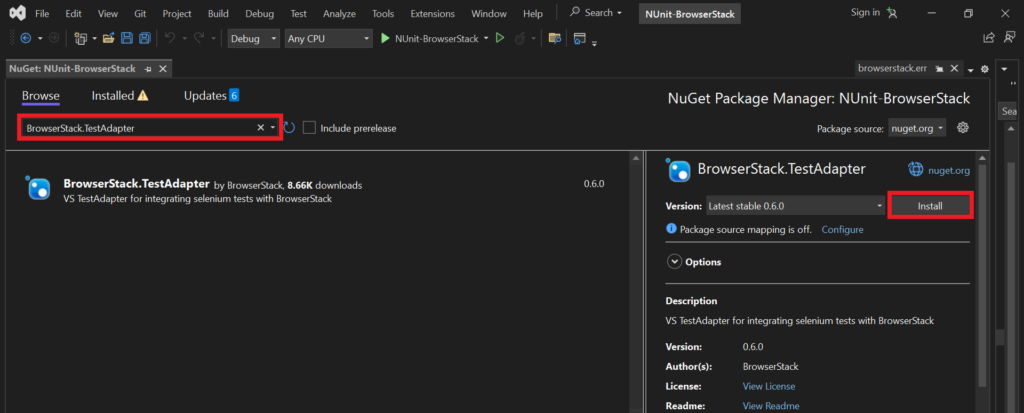
- Test Explorer panel is required. It is included in the BrowserStack Test Adapter from NuGet Packages.

- After installing BrowserStack Test Adapter, you can select Test Explorer from tab Test.

- After choosing the desired tests press right-click on them and select Run.

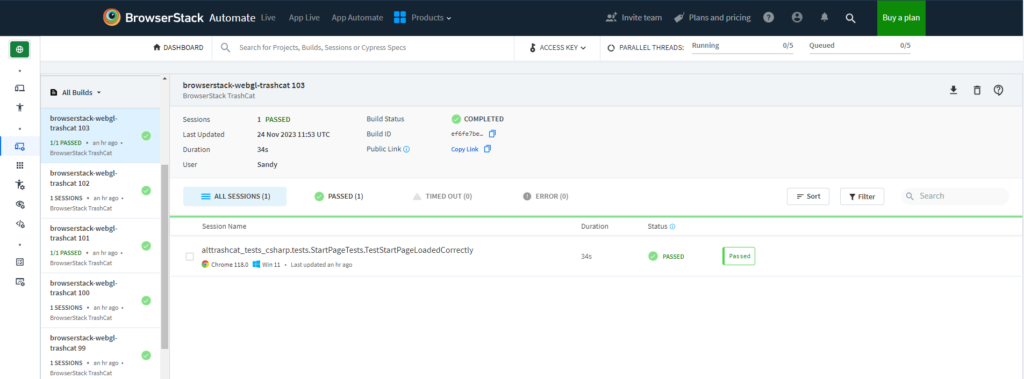
- After a few seconds the session is visible on your Browserstack dashboar.

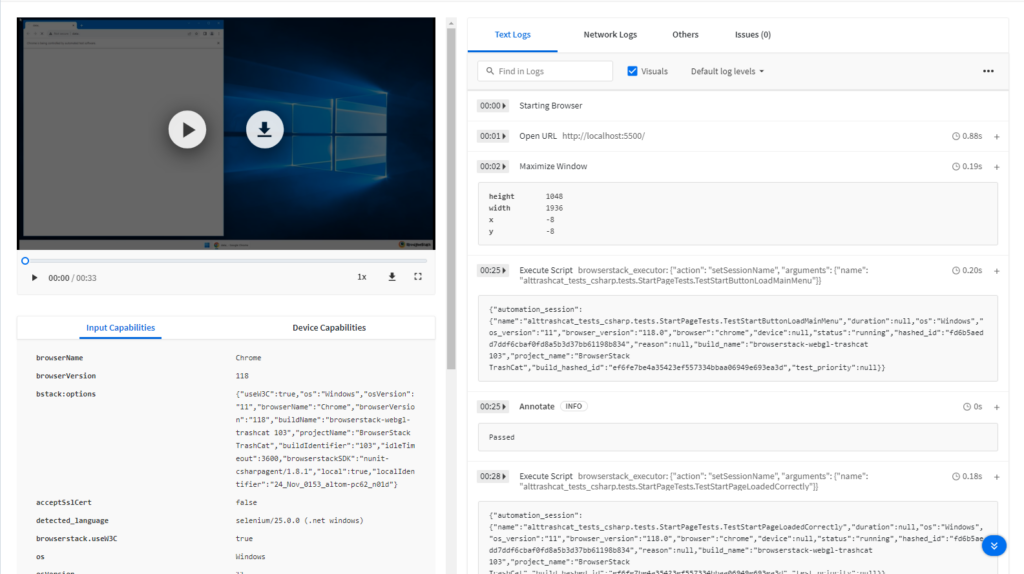
- Every build contains all sessions open for chosen browsers together with the video, build details and logs.

We hope that this tutorial will help you with needed information for running AltTester-based tests on WebGL applications into BrowserStack cloud browsers. The example repository used for this article is available on GitHub.
If you have any questions, you can always contact us on Discord and don’t forget to check out our documentation for further information.
